Knowledge base
1000 FAQs, 500 tutorials and instructional videos. Here, there are only solutions!
This guide explains how to replace an already imported media on an Infomaniak VOD/AOD space and thus preserve the statistics history.
Add a new media to replace another
To access a media from the VOD space:
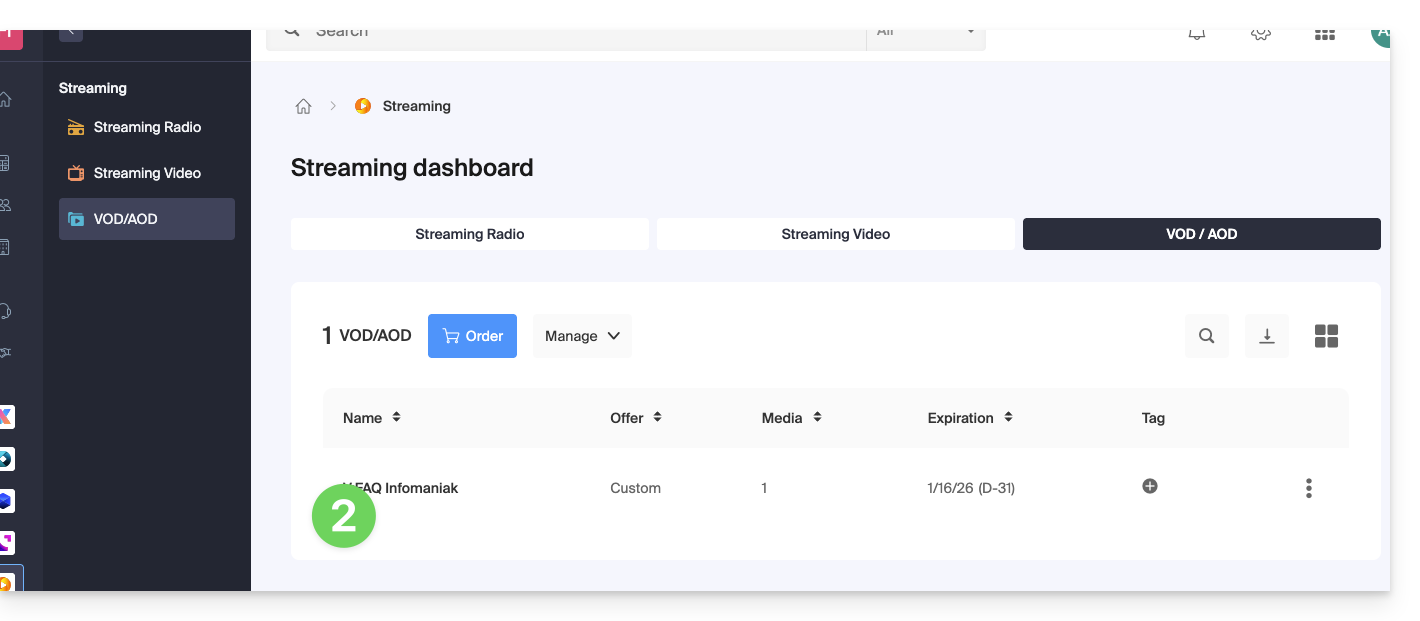
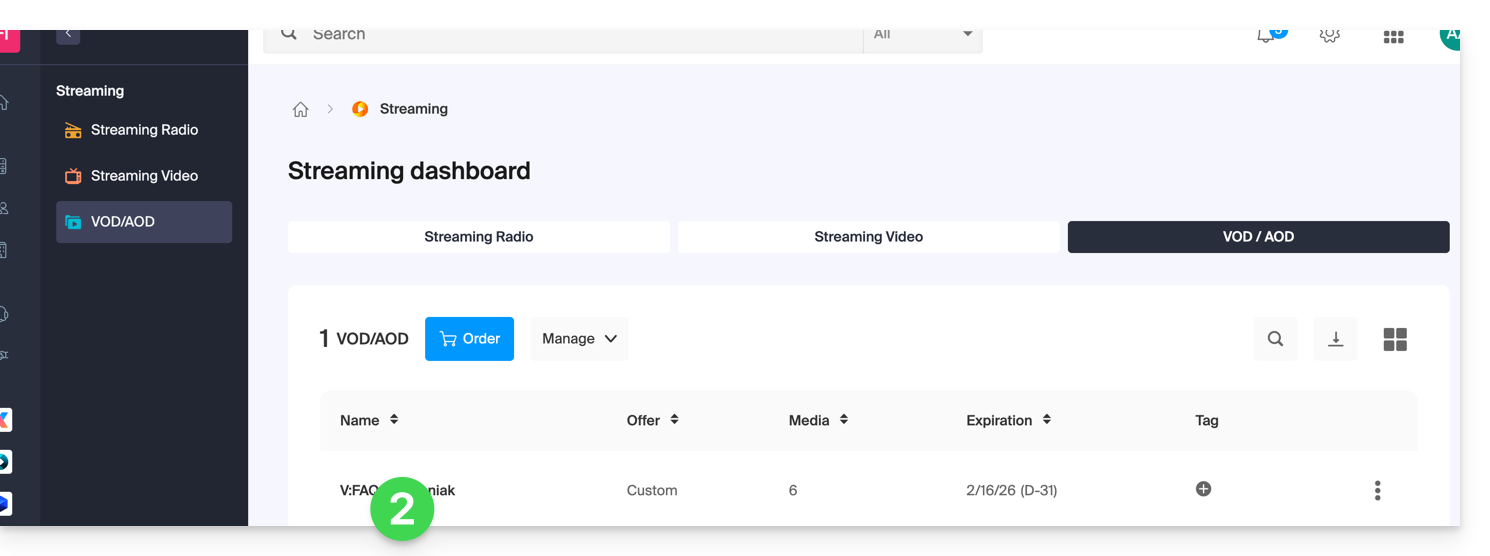
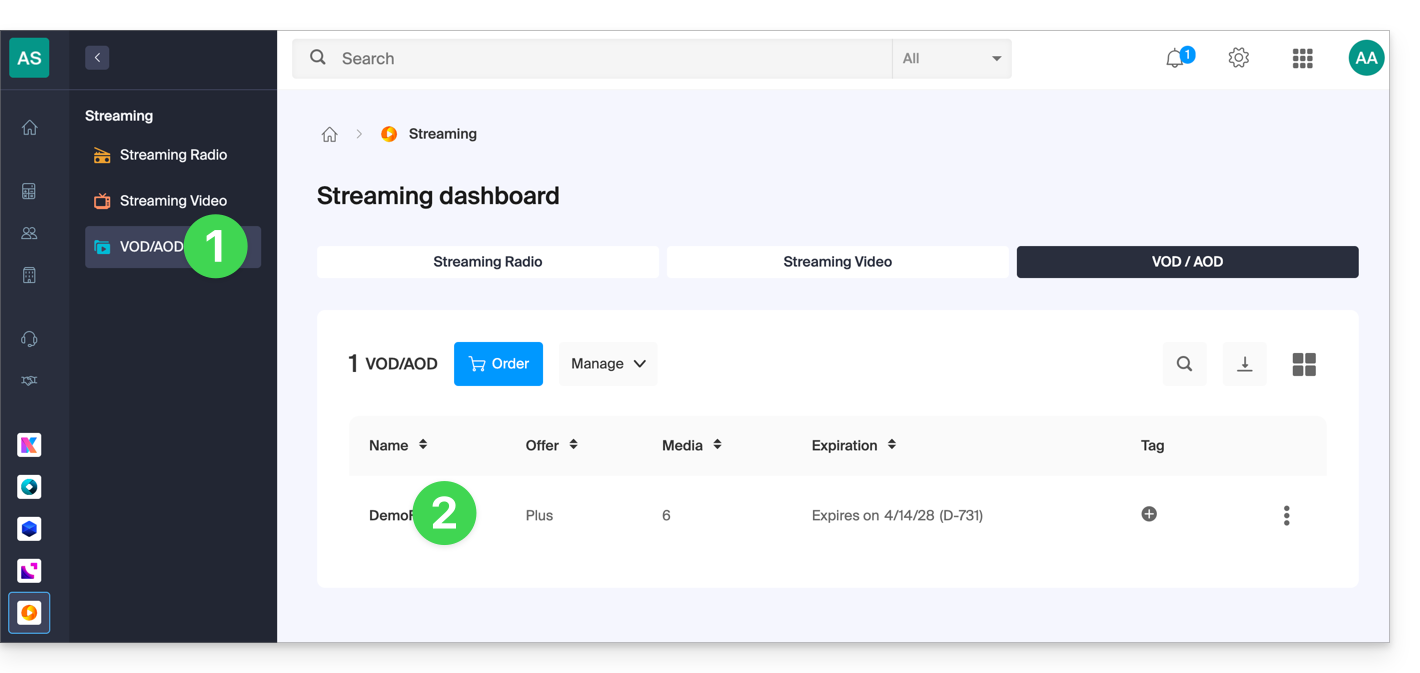
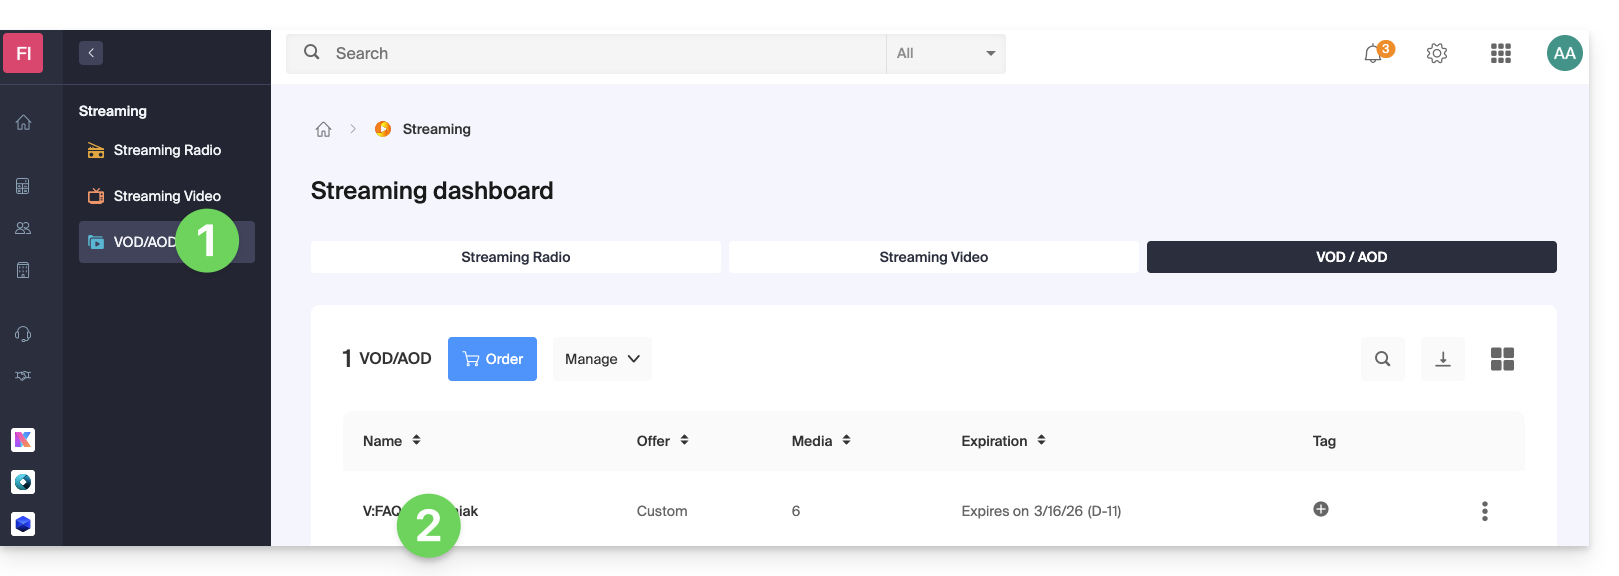
- Click here to access the management of your VOD/AOD on the Infomaniak Manager (need help?).
- Click directly on the name assigned to the product concerned:
- Click on Media in the left sidebar menu.
- Click on Media management in the left sidebar menu.
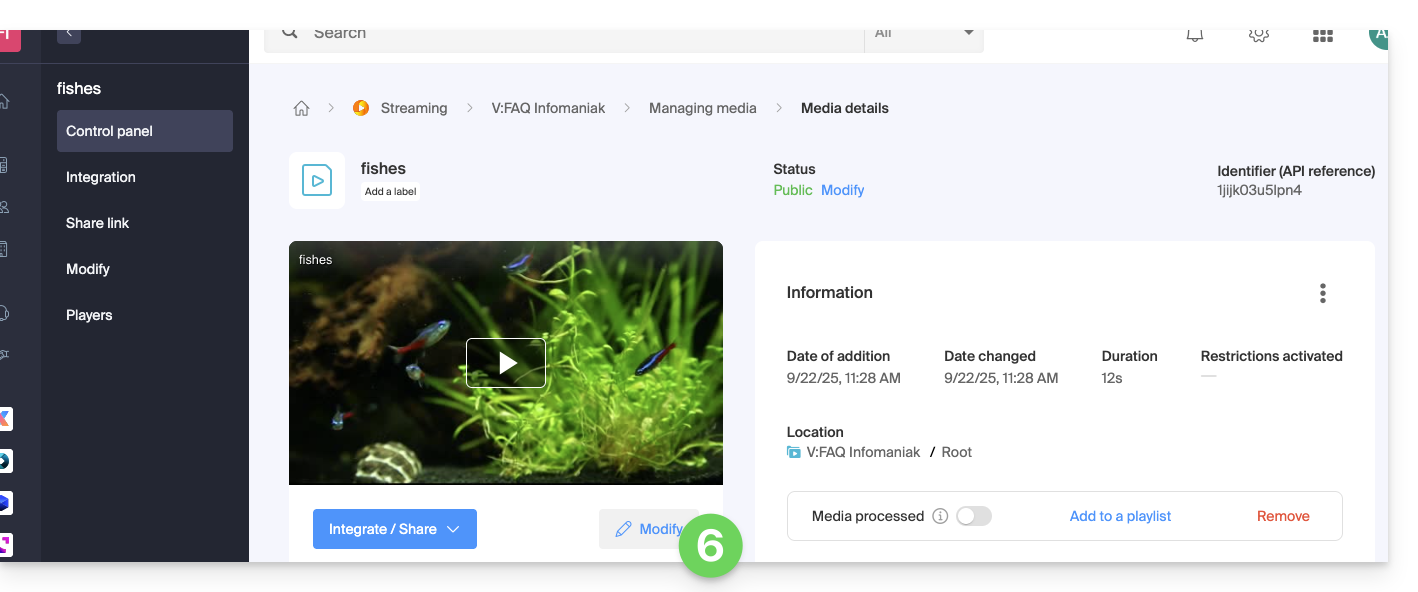
- Click on the media concerned:

- Click on the Edit button:
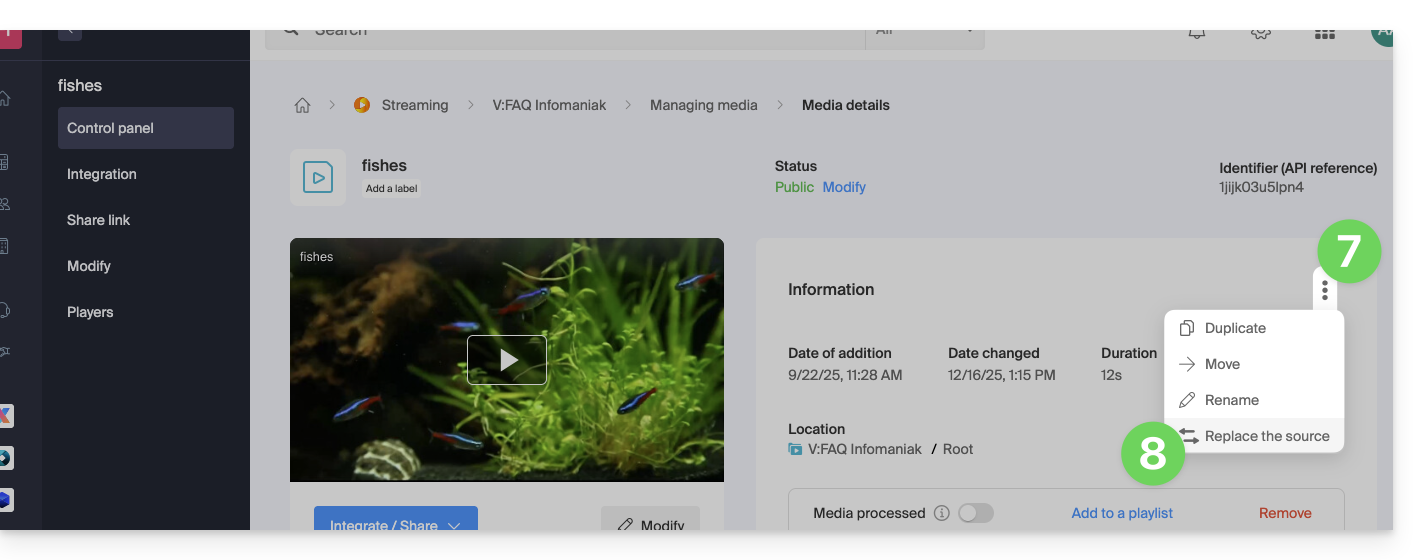
- Click on the action menu ⋮ located to the right under Information.
- Click on Replace source:
- Choose the media from the device's hard drive (or from a removable media) and upload it.
- Wait for the encoding to complete so that the media replaces the previous one.
Replacing a media can also be done via FTP using the same file name as the existing one.
Link to this FAQ:
Has this FAQ been helpful?
This guide explains how to embed video/audio files imported on an Infomaniak VOD/AOD service on web pages.
Preamble
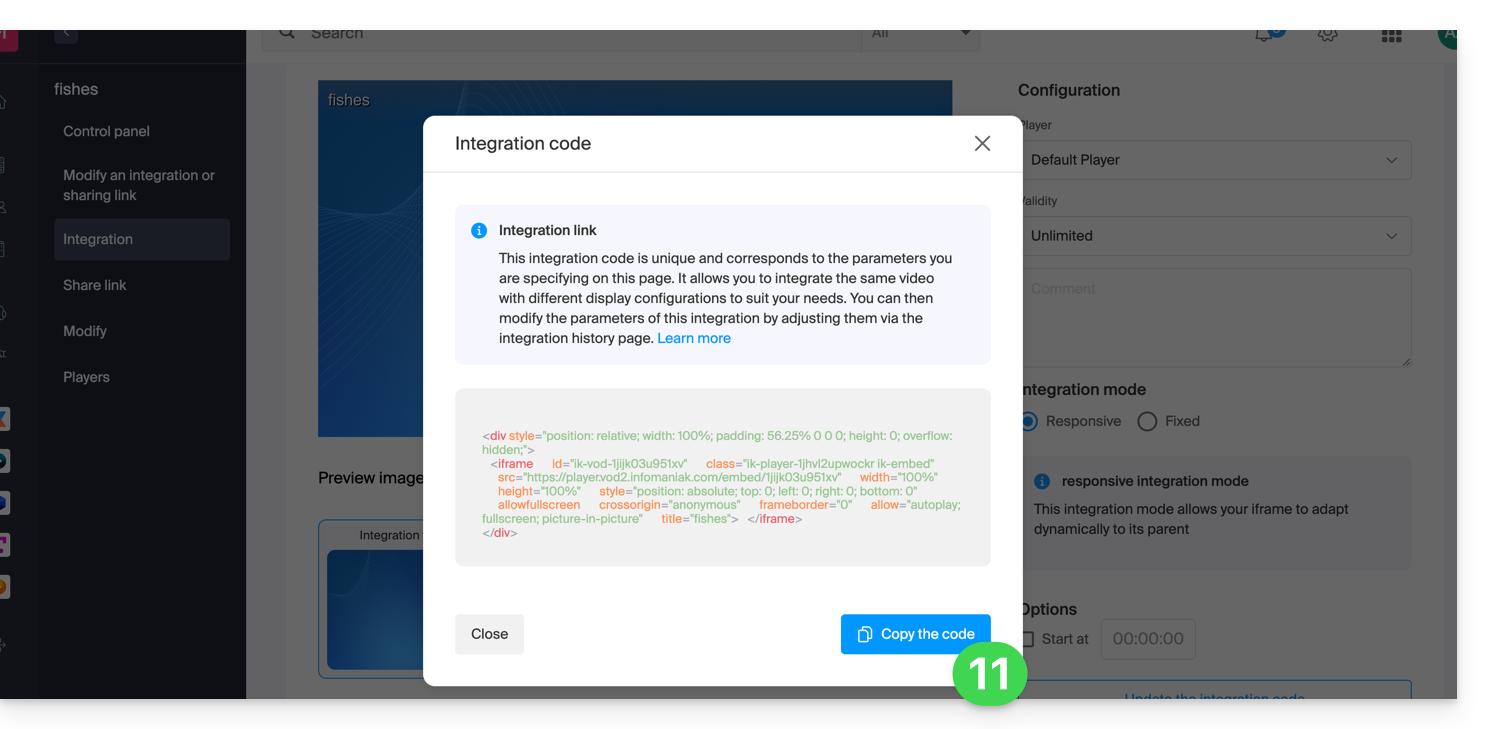
- This VOD/AOD integration code is unique and corresponds to the parameters you are currently specifying on the page.
- It allows you to embed the same video with different display configurations according to your needs.
- Later, you will be able to modify the parameters of this integration by adjusting them from the integration history page on the Infomaniak Manager.
- You can also share a media in different ways.
Generate and copy the integration code
The integration code is on your VOD interface; here is an example with a default Player:
- Click here to access the management of your product on the Infomaniak Manager (need help?).
- Click directly on the name assigned to the product concerned:
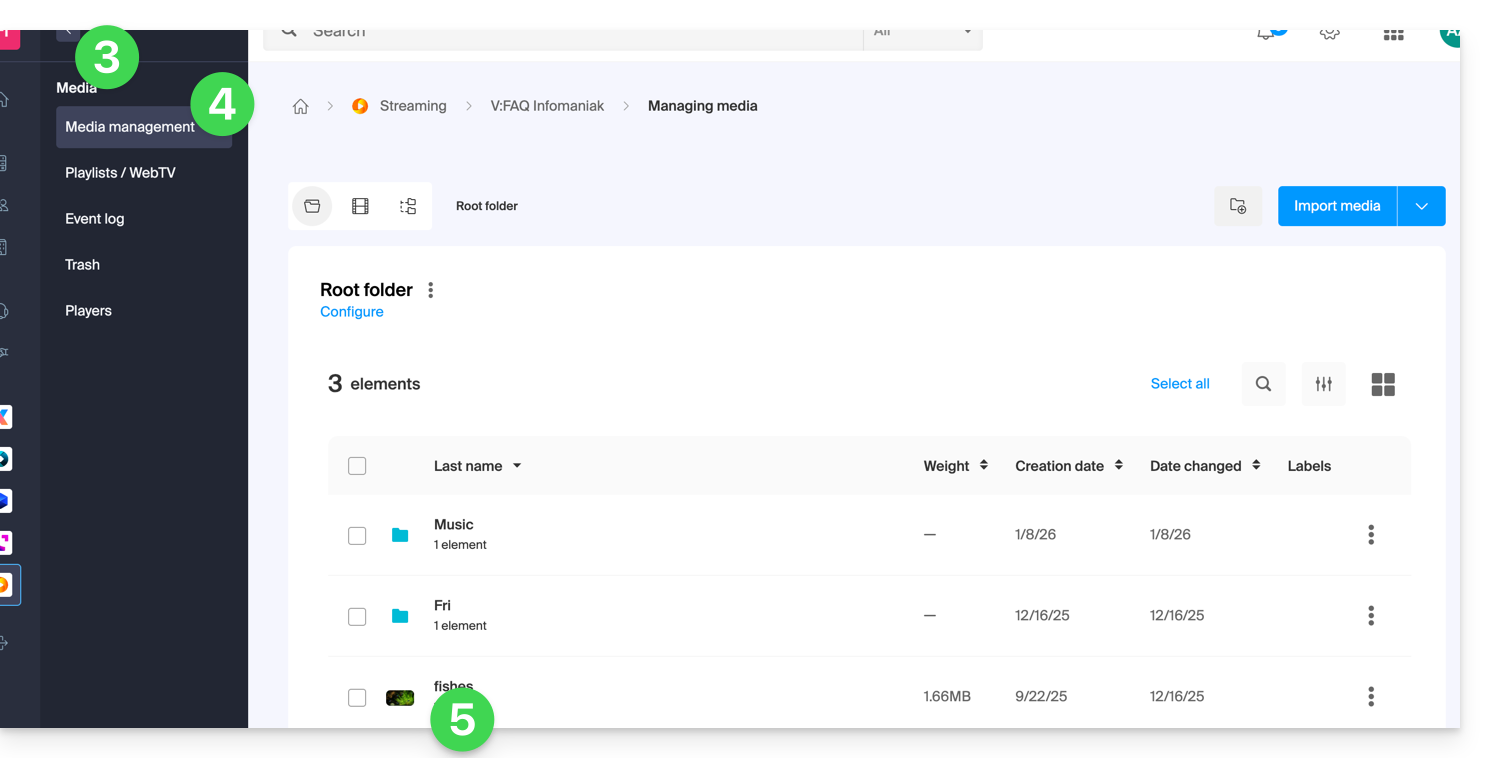
- Click on Media in the left sidebar menu.
- Click on Media management in the left sidebar menu.
- Click on the media concerned in the table that appears:
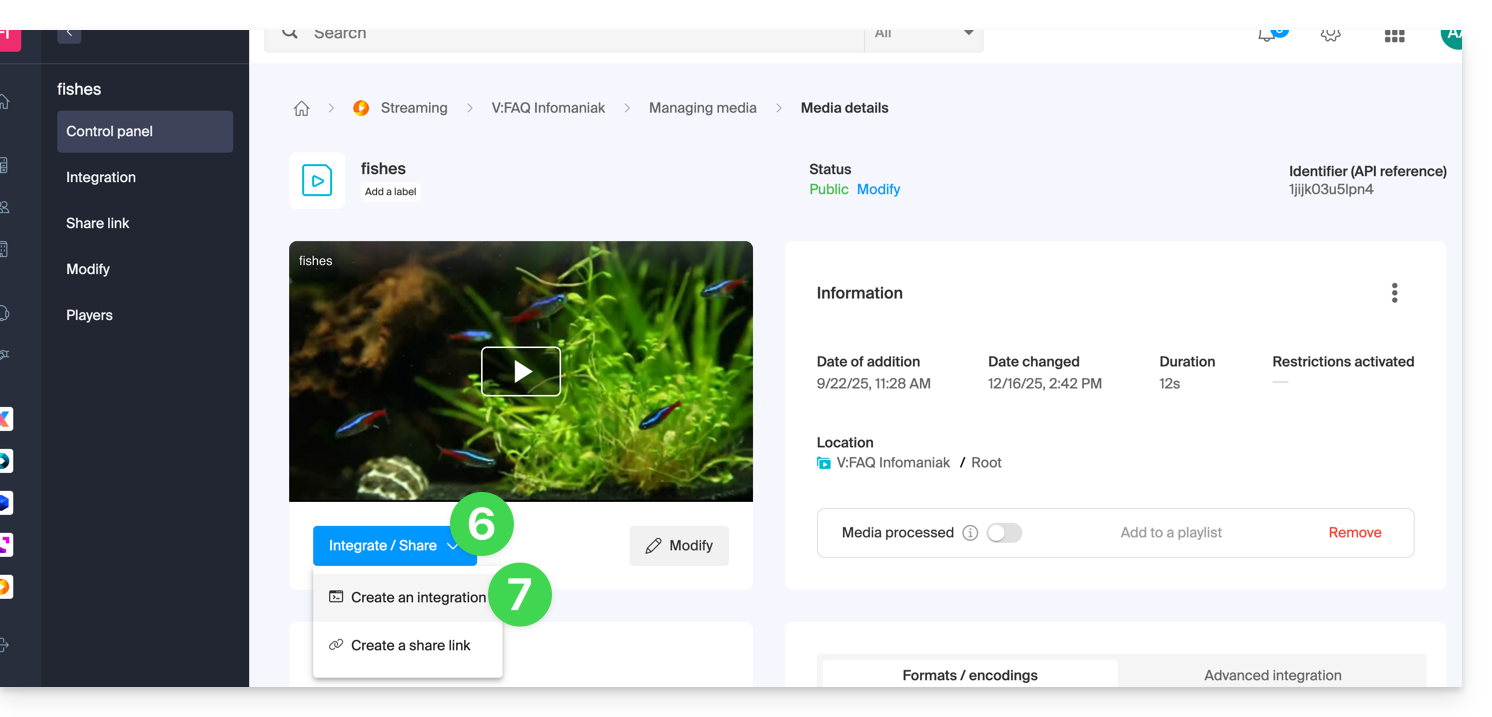
- Click on the blue Embed button.
- Click on Create an integration:
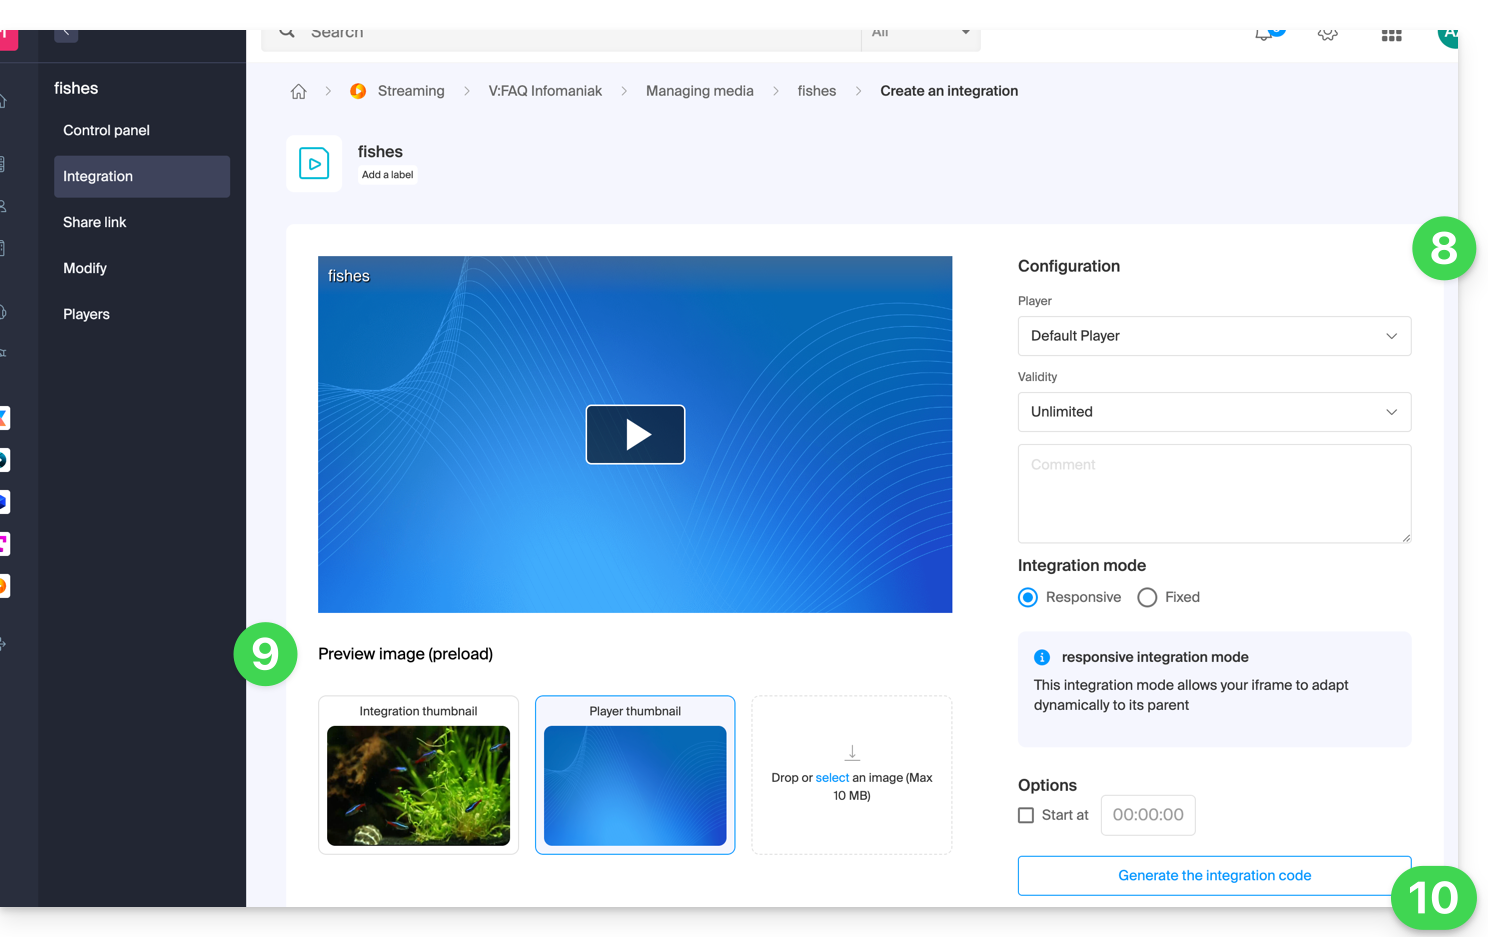
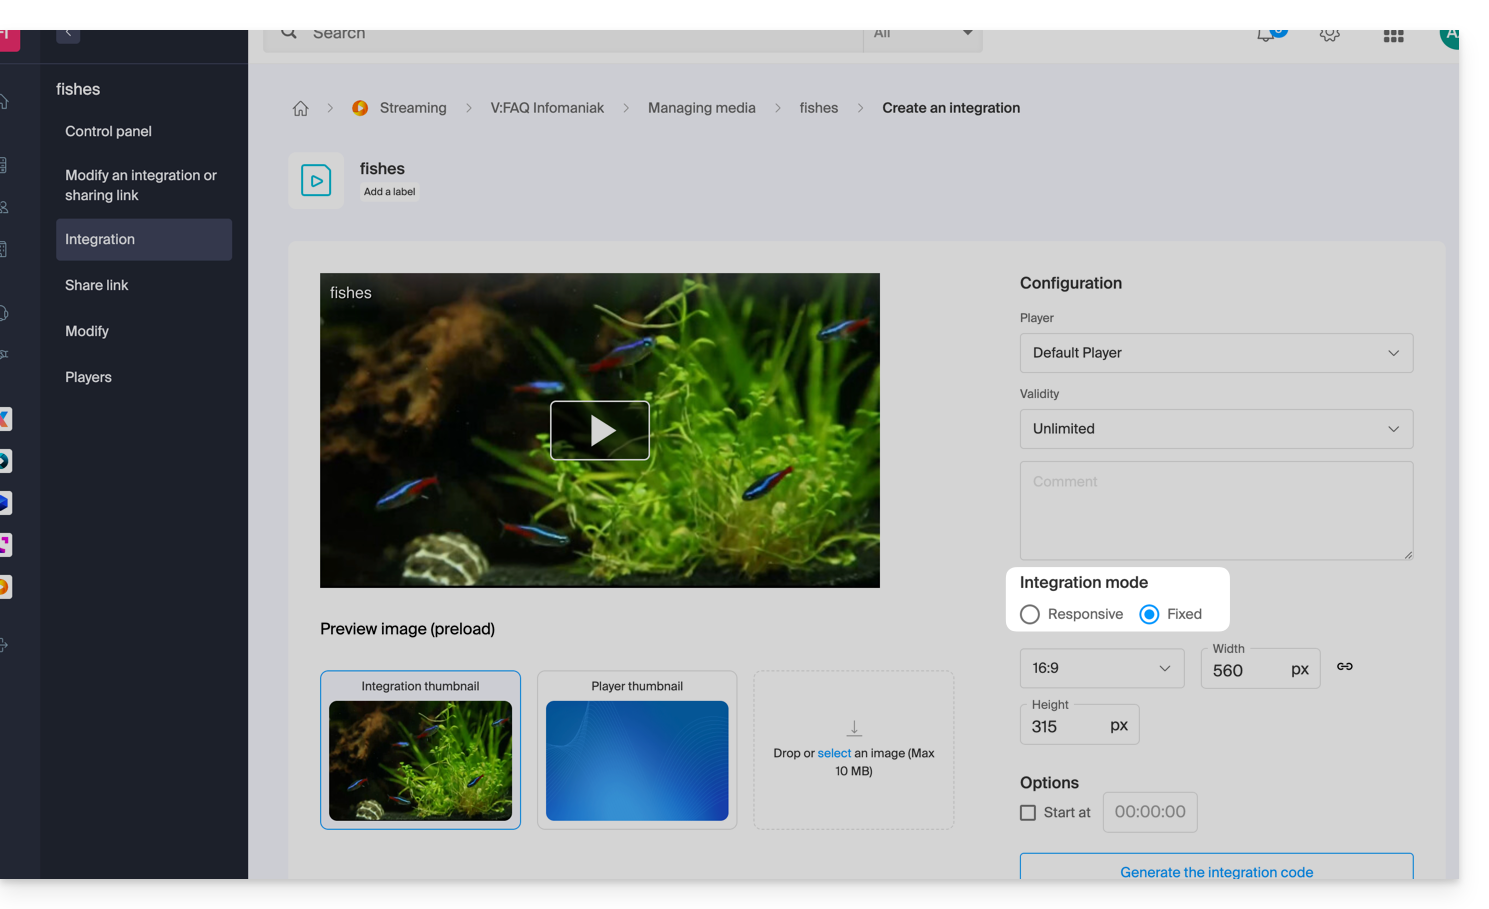
- Customize the media integration (Player to use, timestamp, loop playback, automatic start, …).
- Choose the thumbnail to display when the media is stopped.
- Click on the button to Generate the integration code:
- Copy the code to embed it in the location of your choice:
The media will be inserted with the default Player but you have the option to choose from your created Players the one to be proposed during the integration.
Modify a previous integration
To customize the integration of your media that has already been done, and with the aim of keeping the corresponding code without having to insert it again:
- Click here to access the management of your product on the Infomaniak Manager (need help?).
- Click directly on the name assigned to the product concerned.
- Click on Media in the left sidebar menu.
- Click on Media management in the left sidebar menu.
- Click on the media concerned in the table that appears.
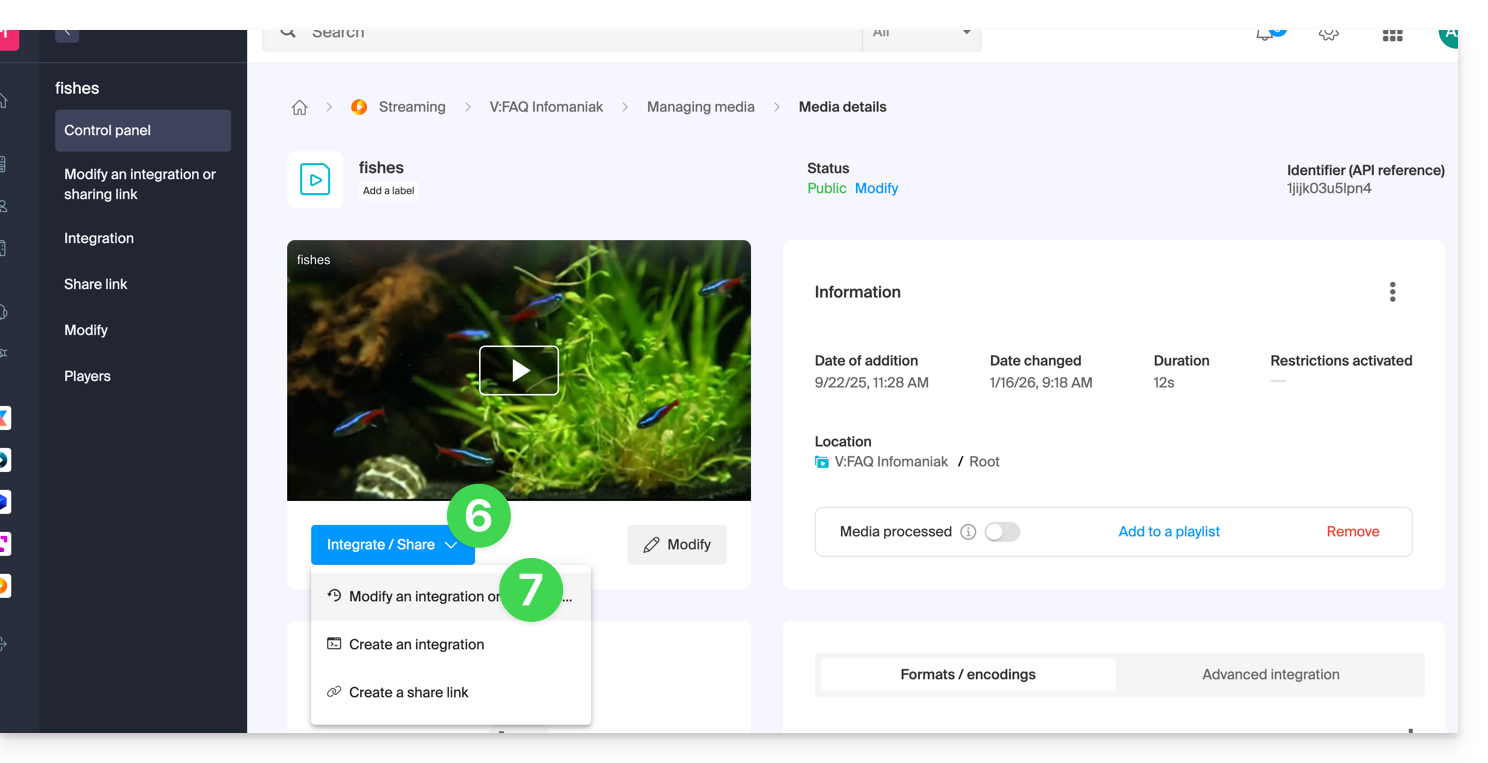
- Click on the blue button Integrate.
- Click on Modify an integration:
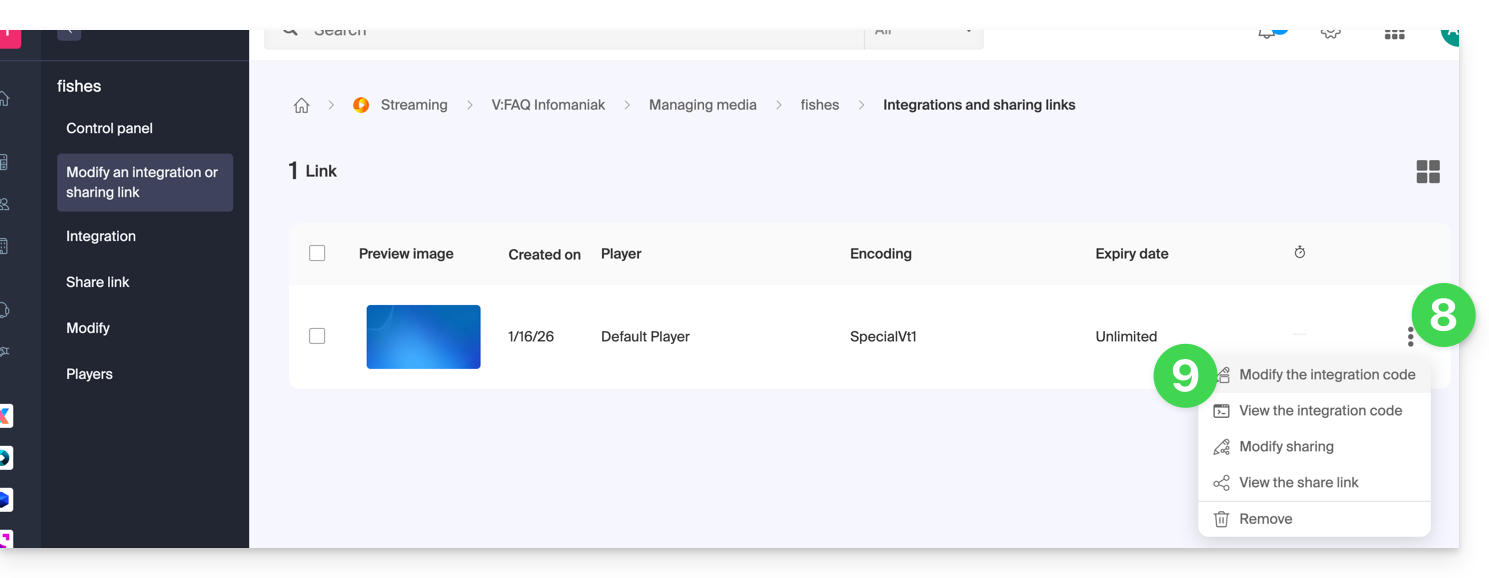
- Click on the action menu ⋮ to the right of the object concerned in the table that appears.
- Click on the desired element to obtain / modify the integration codes:
Paste the integration code…
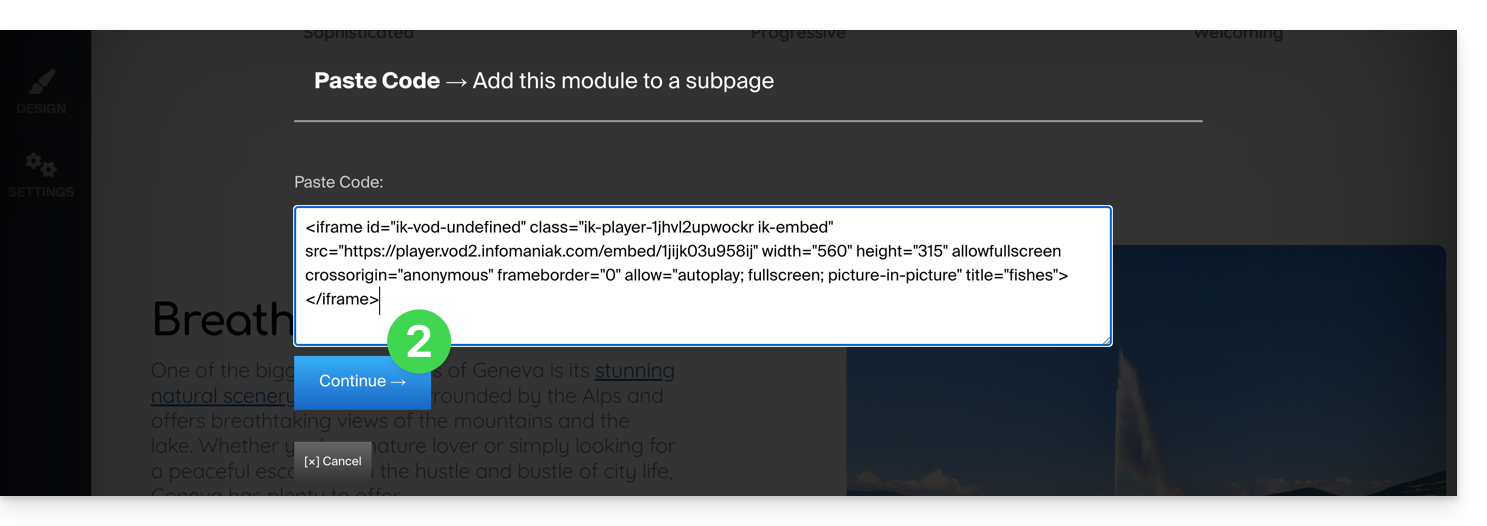
On the Web page of your choice, paste the HTML code where desired: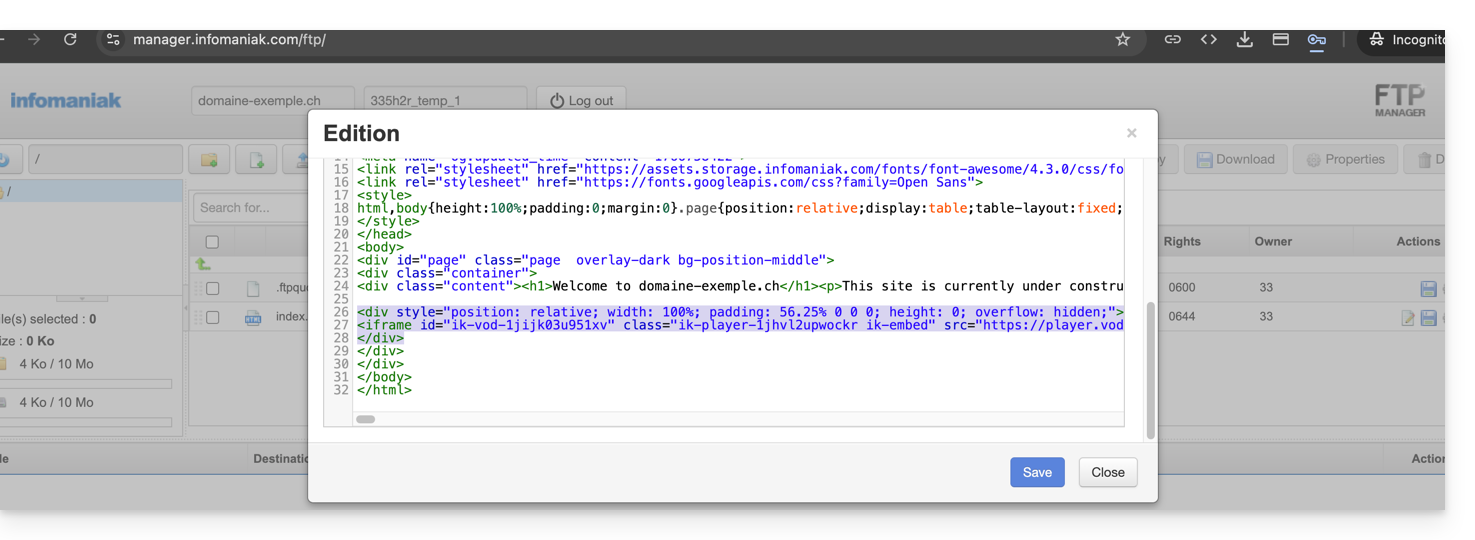
… on Infomaniak Site Creator
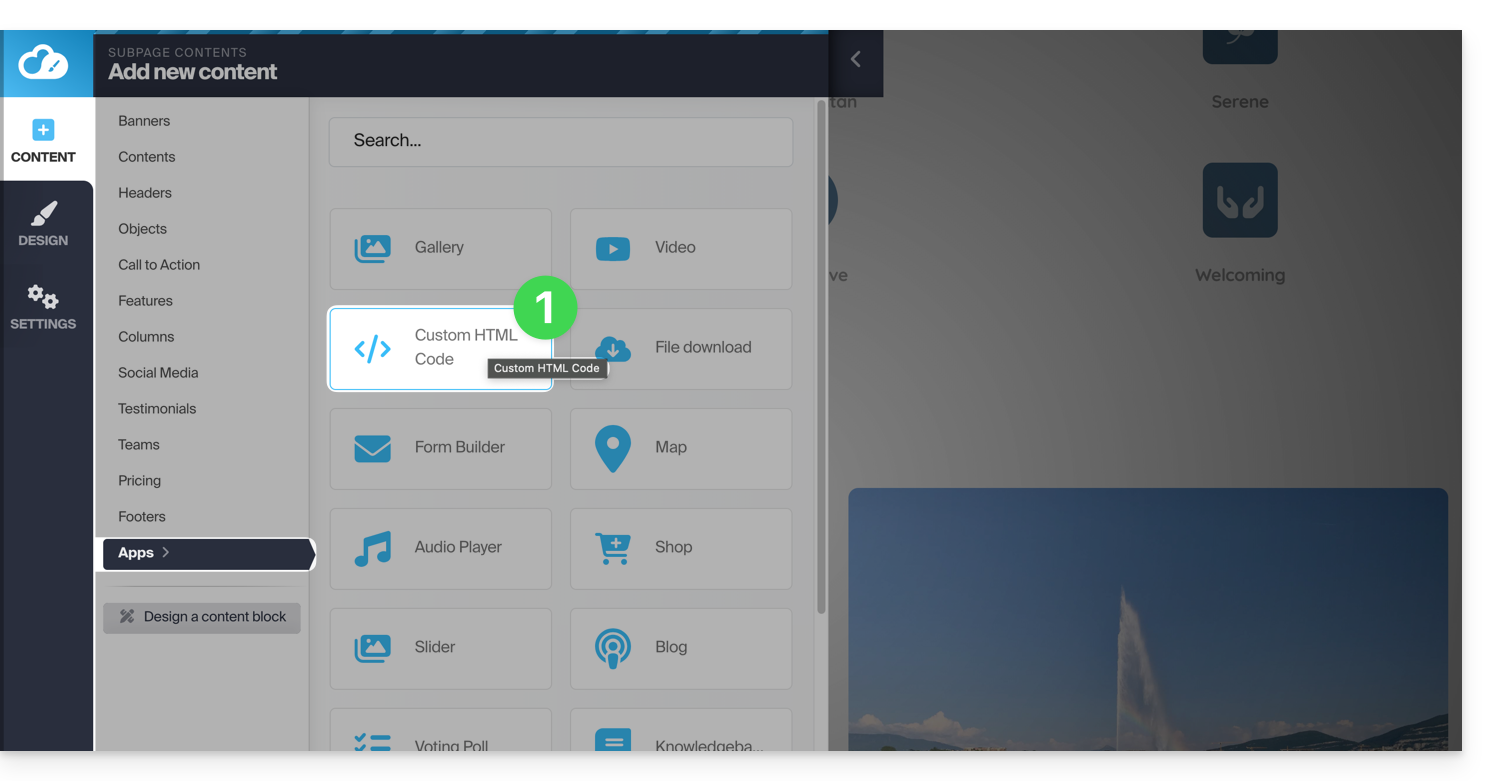
- For Site Creator, you need to generate a “Fixed” integration code (and not “Responsive / Reactive”):
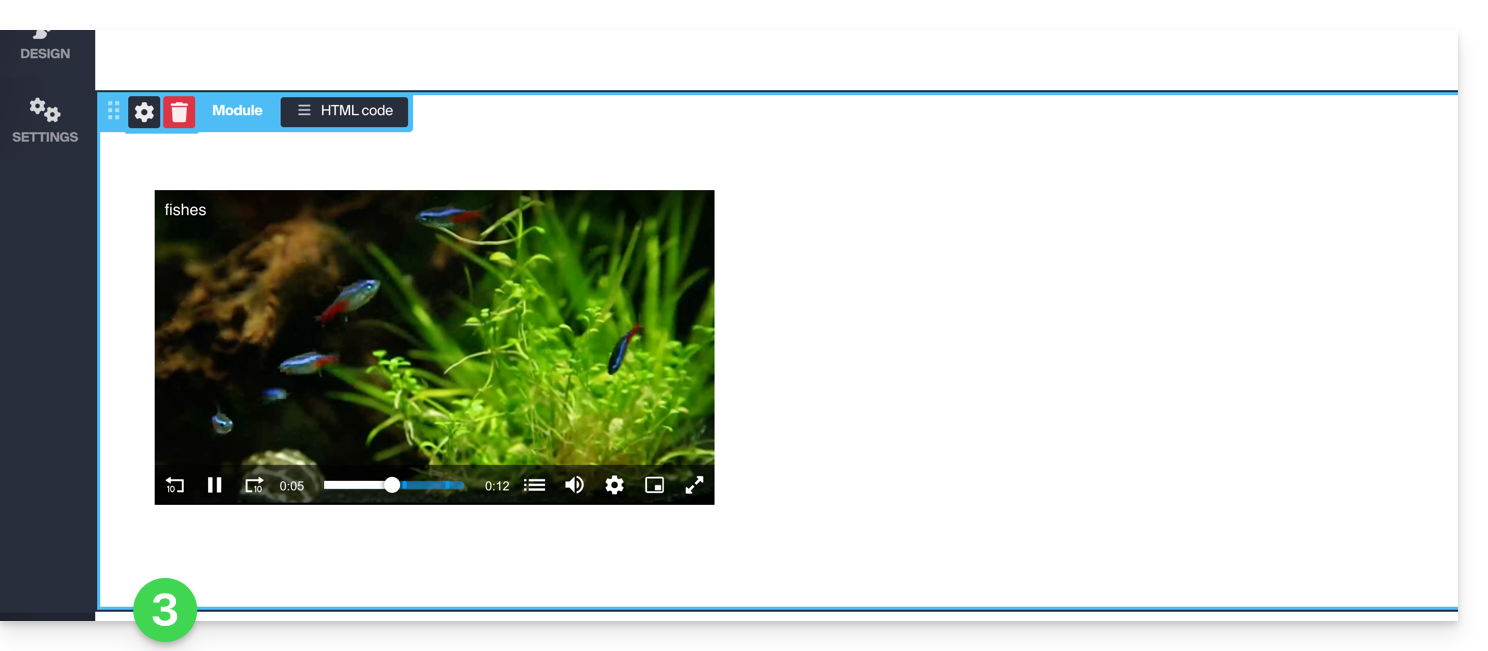
- Then paste this code on Site Creator within a “Custom HTML Code” block:
Link to this FAQ:
Has this FAQ been helpful?
This guide explains how to integrate ads during media playback by your Infomaniak VOD Player.
Preamble
- You can insert multiple videos as ads and their source can be:
- your own videos already imported,
- URLs if you have an ad network (Google Marketing Platform, Openx, Oath, Tremor Video DSP, etc.).
- The ad can be Pre-roll, Mid-roll and Post-roll so loaded at the beginning, middle, or end of your video.
- You can offer the viewer the option to skip the ad (after the number of seconds of your choice).
Configure the VOD Player ad
Prerequisites
- Create a Player within your VOD/AOD space.
Once in your Player configuration: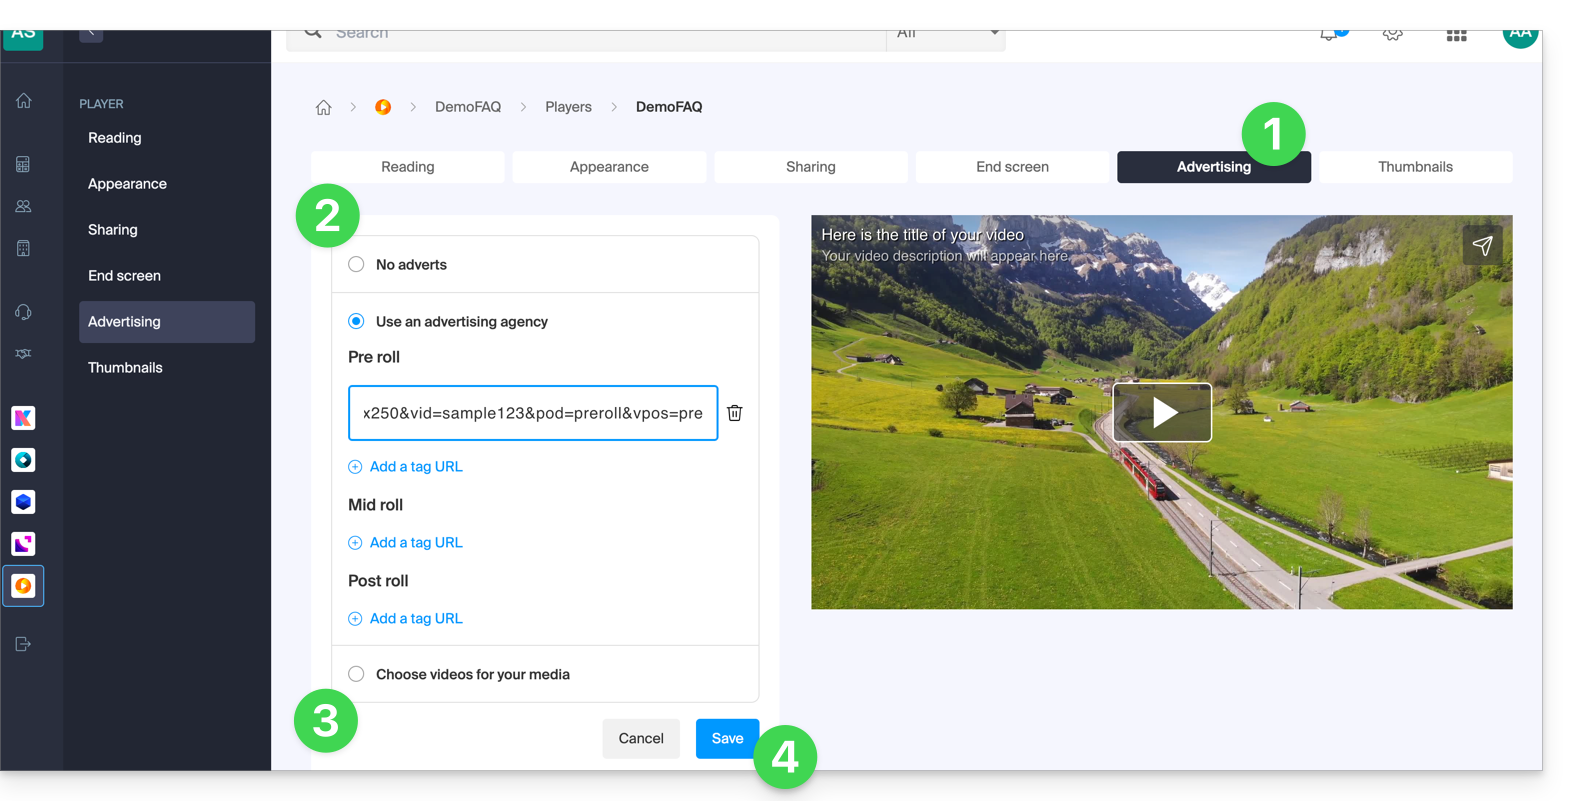
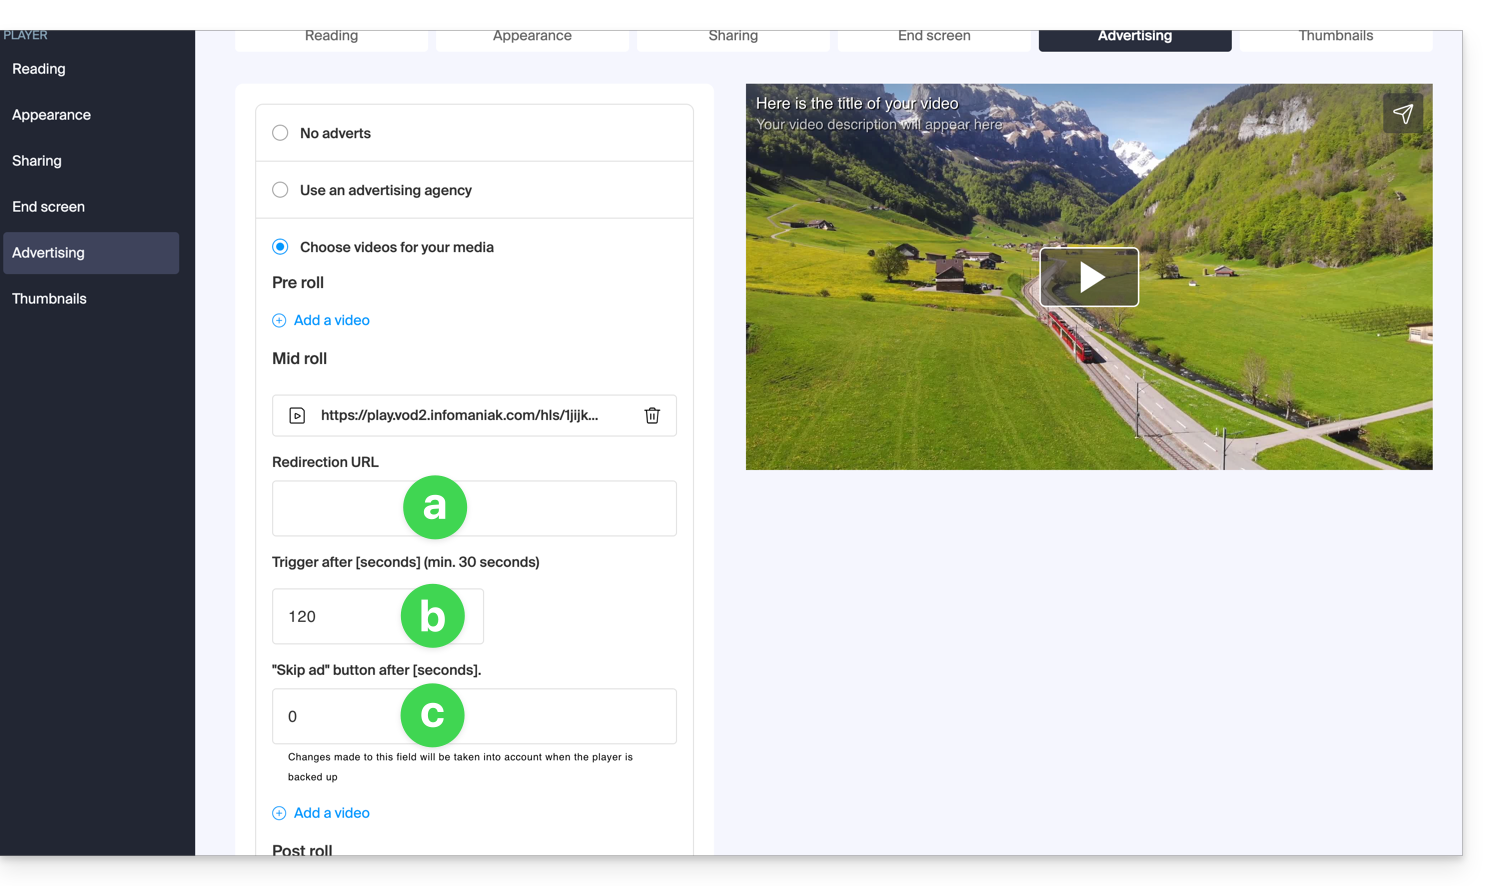
- Click on the Advertising tab.
- Choose between:
- no ads,
- links provided by your ad network,
- video(s) from your library.
- Note, you cannot mix the two types of ads; you lose the information already entered if you change the type of ad.
- If you choose one or more videos from your media, you can choose:
- the URL to which to send the viewer if they click on the ad to learn more,
- the moment when the video should start (only mid-roll),
- the moment when the viewer can skip the ad:
- Click the button to Save.
Link to this FAQ:
Has this FAQ been helpful?
This guide explains how to share video/audio files imported on an Infomaniak VOD/AOD service.
Preamble
- When sharing a media hosted with Infomaniak, you have the possibility to specify, among other things:
- the exact moment of the video (timestamp hour/minute/second) at which the viewer using the link in question will access
- an expiration date for the share link
- which of your Players should be used to play the media
- the automatic start of the media once the share link is executed
- the looped playback of the shared media
- A share button (Whatsapp, X, etc.) can also be configured within the Player itself.
Share a VOD/AOD media from the Manager
To do this:
- Click here to access the management of your product on the Infomaniak Manager (need help?).
- Click directly on the name assigned to the product in question:
- Click on Media in the left sidebar menu.
- Click on Media Management in the left sidebar menu.
- Click on the action menu ⋮ of the media in question in the table that appears.
- Click on Share:

You can also click on the media in question to have a more complete sharing solution:
- In point 5 above, click directly on the thumbnail of the media in question.
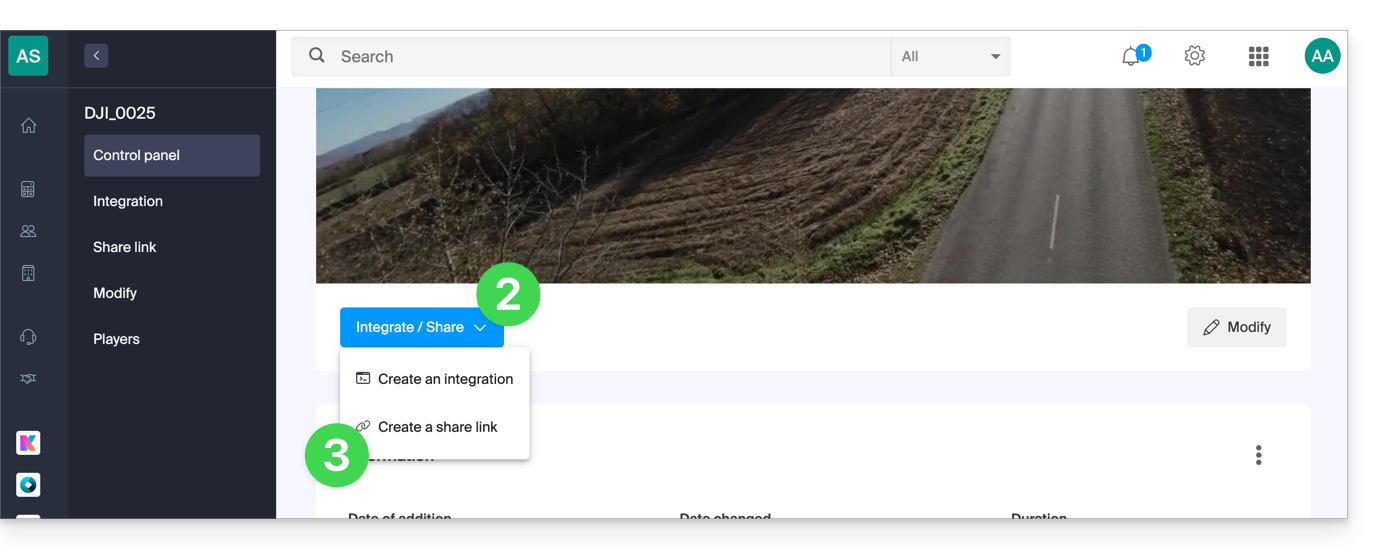
- Click on the blue Share button.
- Choose to create a share link:
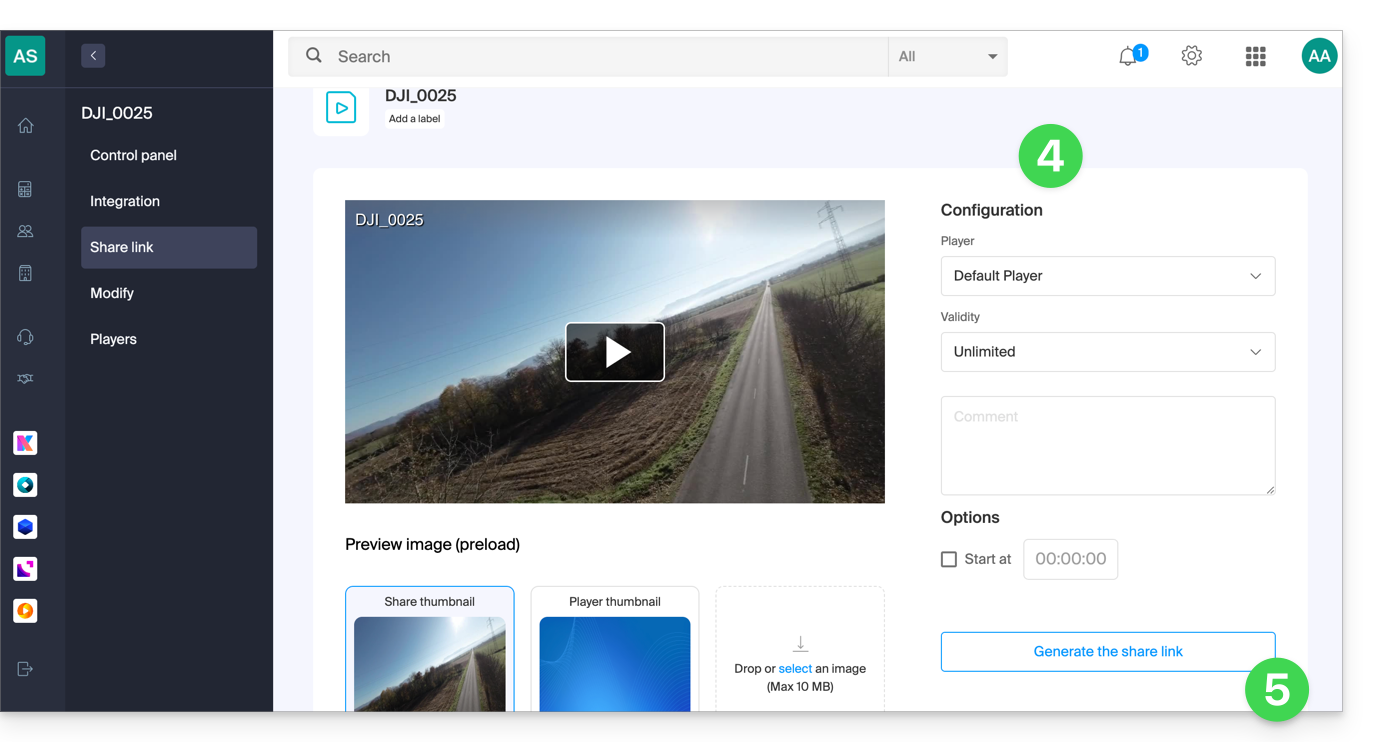
- Set the desired options including the thumbnail of the shared video if necessary.
- Click the button to generate a share link:
Use the share link
Every time you click the button to generate or update the share link, you get a box proposing easy sharing to different platforms like Linkedin or Whatsapp: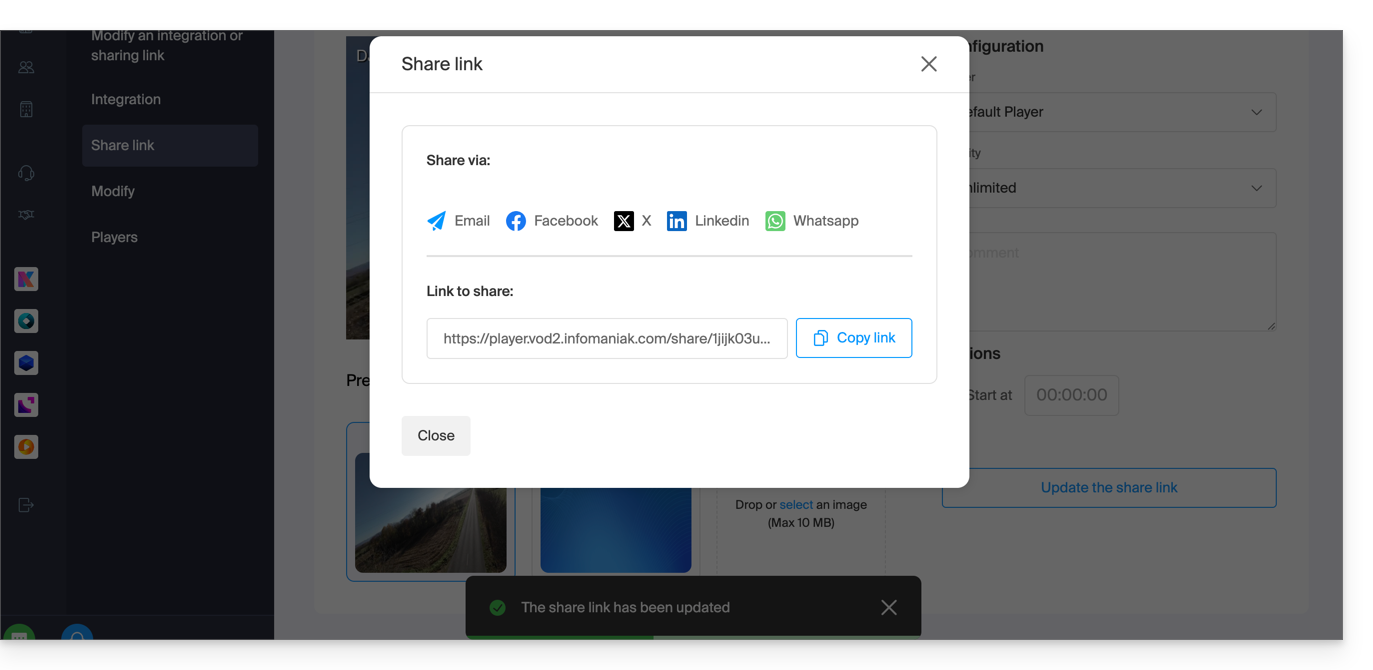
To simply obtain a link leading directly to the media in question, click the link copy button.
Executing this link will display a simplified page broadcasting your media and the comment associated if you had indicated one:
A share button on this broadcast page allows you to reshare the video to other people or integrate it (including via an iframe code) directly on compatible platforms:
Modify or delete a share link
To do this:
- Click here to access the management of your product on the Infomaniak Manager (need help?).
- Click directly on the name assigned to the product concerned.
- Click on Media in the left sidebar menu.
- Click on Media Management in the left sidebar menu.
- Click directly on the thumbnail of the media concerned.
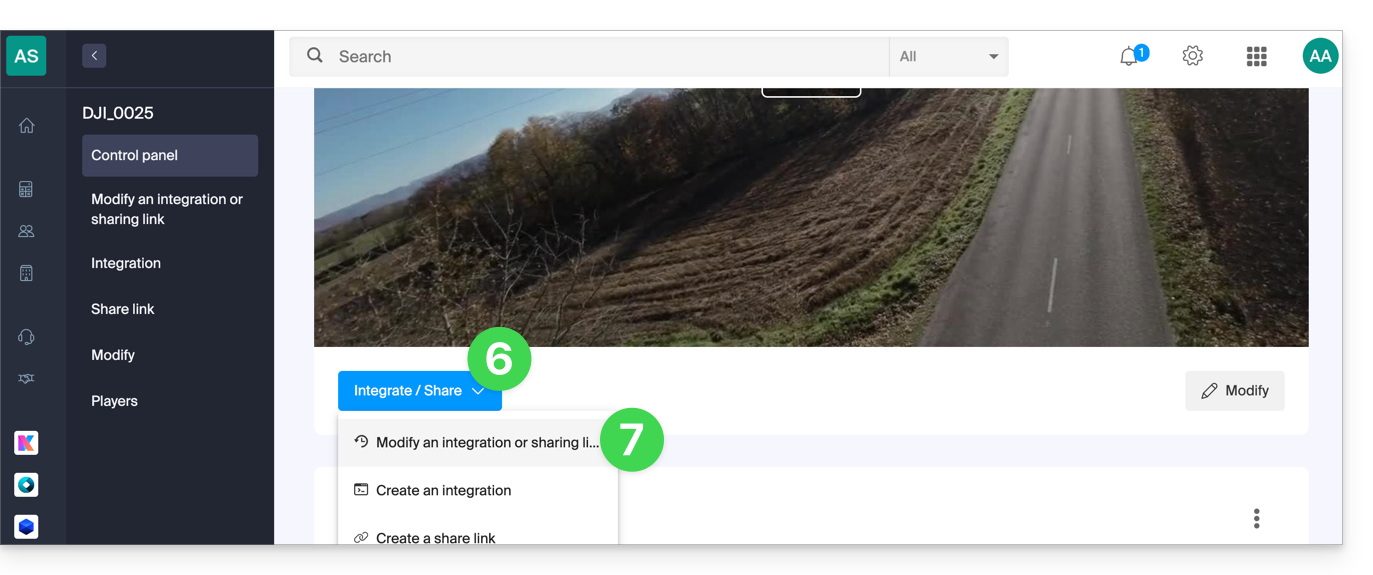
- Click on the blue Share button.
- Choose to modify a share link:
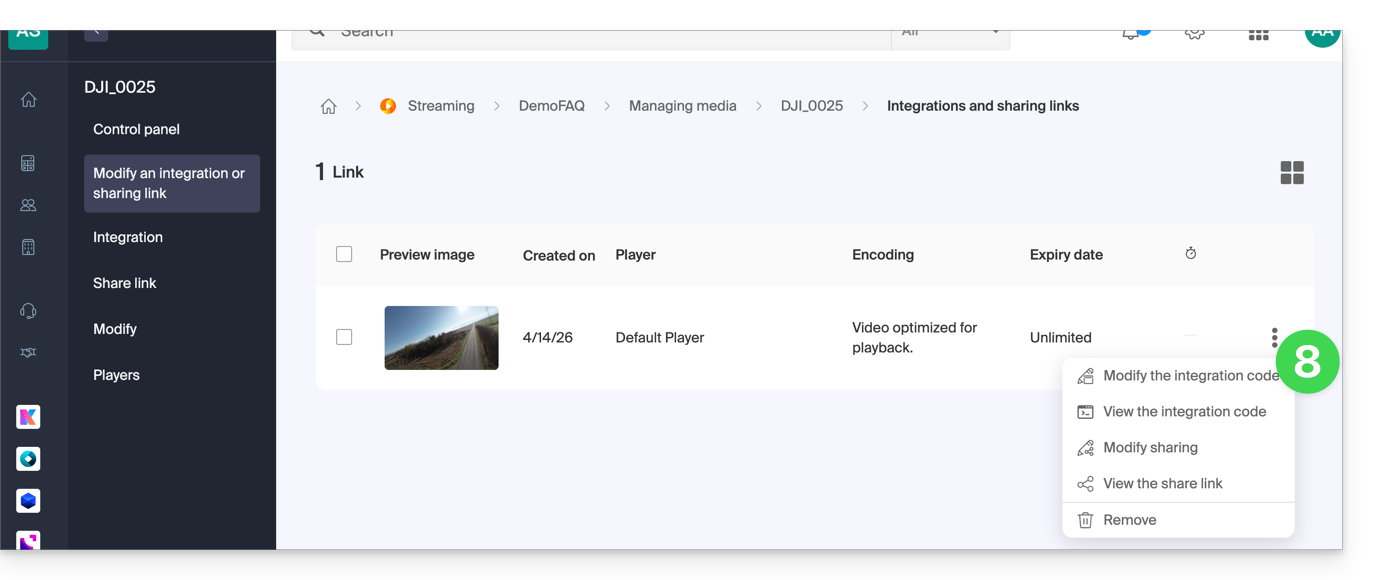
- From the page that appears, click on the action menu ⋮ to the right of the link to modify or delete:
Link to this FAQ:
Has this FAQ been helpful?
This guide allows you to quickly use the essential functions of your VOD/AOD space Infomaniak.
Manage media
- Import a media file
- Move a media file
- Edit a media file
- Manage media subtitles
- Add a new media file to replace another
- Download the source media
Broadcast / share media
- Manage Players
- Embed media
- Share media
- Manage media sharing from a Player
- Embed and share media on WordPress
- Broadcast a VOD list live on Video Streaming
- Modify a thumbnail
- Create chapters on a video
- Manage advertisements within a Player
Secure VOD/AOD
- Secure videos by GeoIP restriction
- Secure videos by password
- Secure videos by unique key
- Add a watermark
A question or feedback?
- In case of a problem, please consult the knowledge base before contacting support.
- Click here to share feedback or a suggestion about an Infomaniak product.
Link to this FAQ:
Has this FAQ been helpful?
A Player (i.e., a media file player) is essential for your media when you integrate the latter on your Infomaniak VOD/AOD space to offer them to your viewers and internet users.
Create a Player
To create a Player:
- Click here to access the management of your product on the Infomaniak Manager (need help?).
- Click directly on the name assigned to the product concerned:
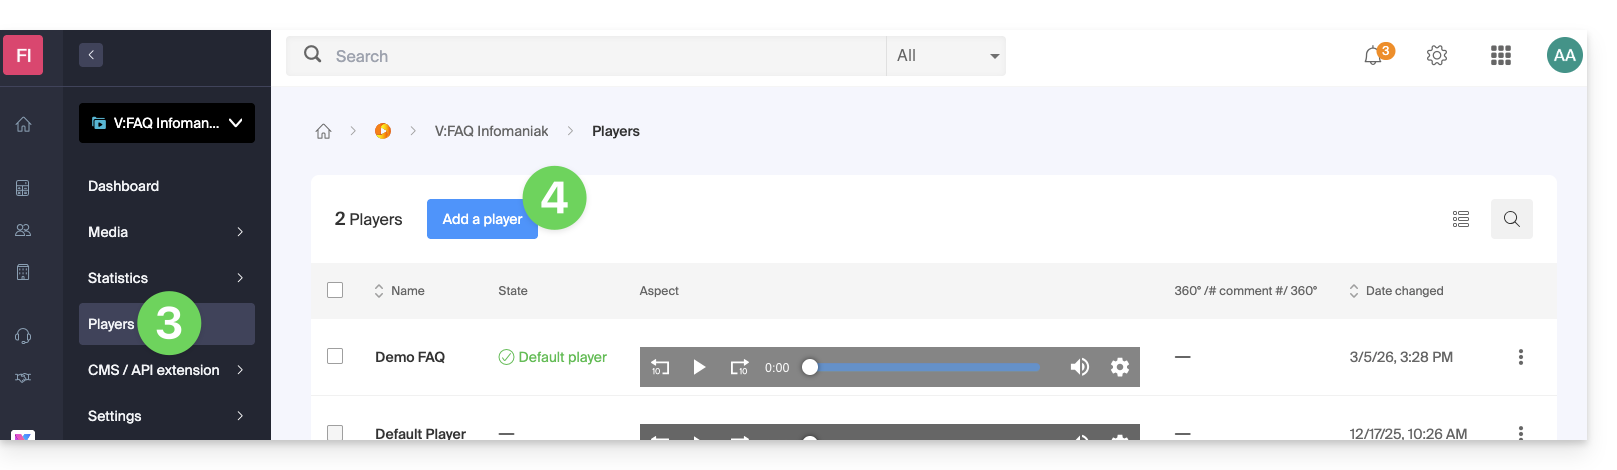
- Click on Players in the left sidebar menu.
- Click the blue button to add a new Player:
- You then arrive on the configuration page and tabs (or menus) allow you to manage various aspects of the Player, such as the playback bar at the bottom and sharing icons:
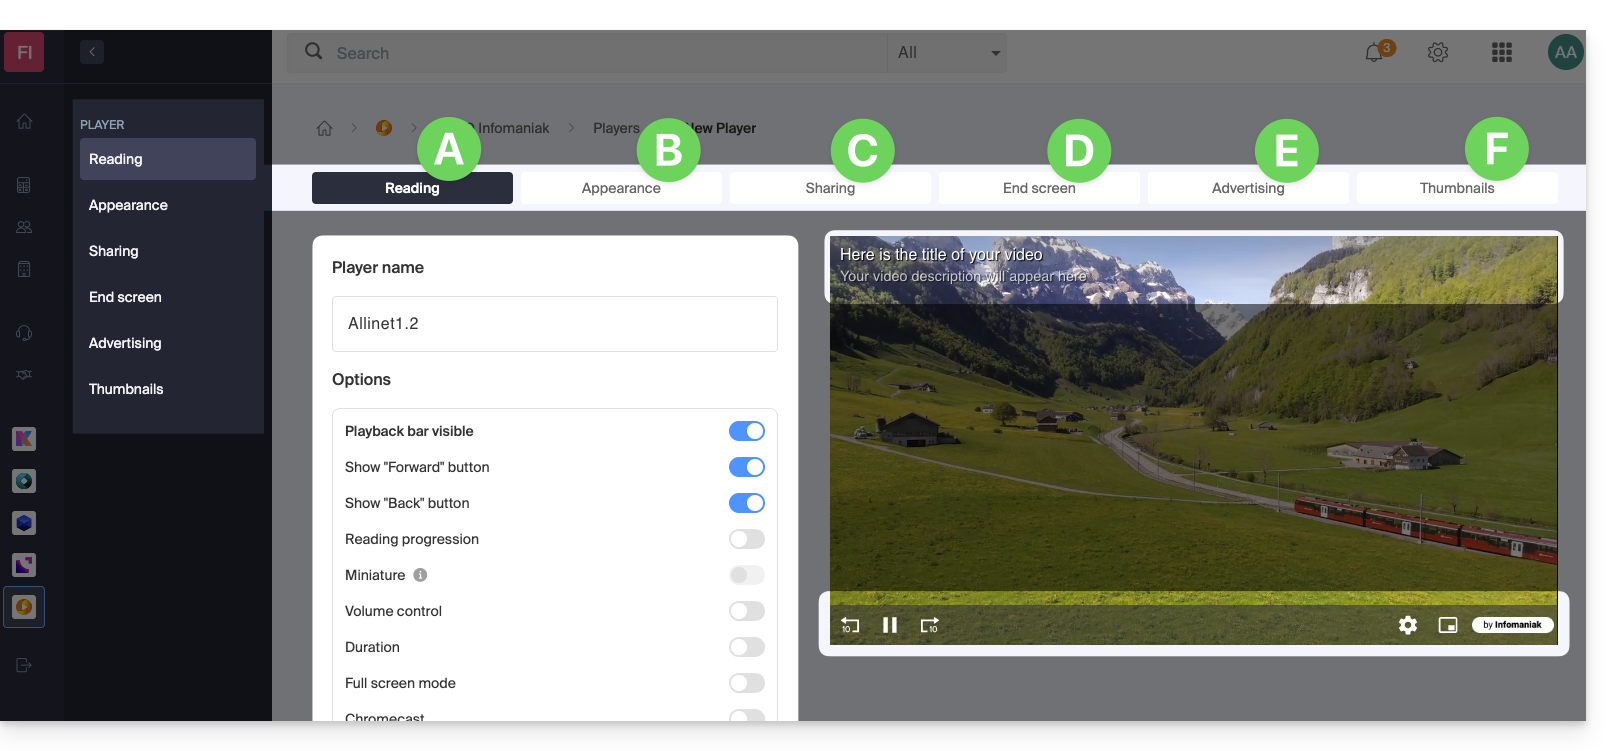
A. Playback tab
This is where you can name the Player and customize the elements that should or should not be included:
- playback bar (with or without disappearance after X seconds of inactivity)
- Fast forward and Rewind button
- display of playback progress and if so, display of thumbnails on the playback bar
- volume control
- media duration
- Full screen display
- Chromecast (if you display it, the option can be enabled by a viewer using the Chrome browser and having a Chromecast on the same network)
- Infomaniak logo
- "Skip intro" button and if so, at which timecode to send the viewer
It is also possible to choose the MPEG-DASH playback mode instead of the default HLS, to automatically start playback (autoplay) when the media is loaded, and to force the display of subtitles (which the viewer can always disable if they wish).
B. Appearance tab
This is where you can choose the colors and styles (templates) of the Player, as well as a logo and the display of the title and description of the media.
C. Sharing tab
This is where you can choose the permissions regarding sharing and integration of the Player on other sites.
D. End Screen tab
This is where you can define an overall behavior for the Player's end screen (e.g., suggesting the next video to watch based on what is in the same folder). You can also adjust these settings individually for each video.
E. Advertising tab
The Pre-roll, Mid-roll, and Post-roll are managed here. Refer to this other guide on this topic.
F. Thumbnails tab
This is where you can choose the images visible when the media is loading or unavailable/restricted (this does not replace the video thumbnail).
Modify a Player
To modify and access the settings of an existing Player:
- Click here to access the management of your product on the Infomaniak Manager (need help?).
- Click directly on the name assigned to the product in question.
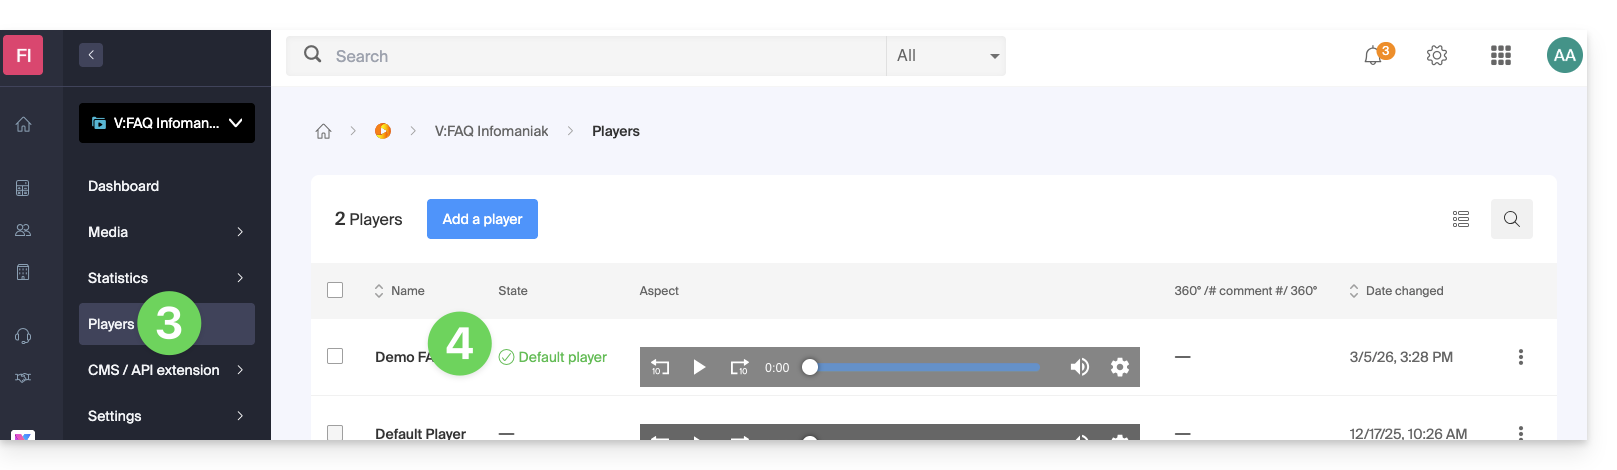
- Click on Players in the left sidebar menu.
- Click directly on the name assigned to the Player in question:
Fullscreen button
It is not possible to automatically display the media directly in fullscreen at the start of playback.
You need to click to start playback and then click on the fullscreen button, having added it beforehand to your Player on the Playback tab: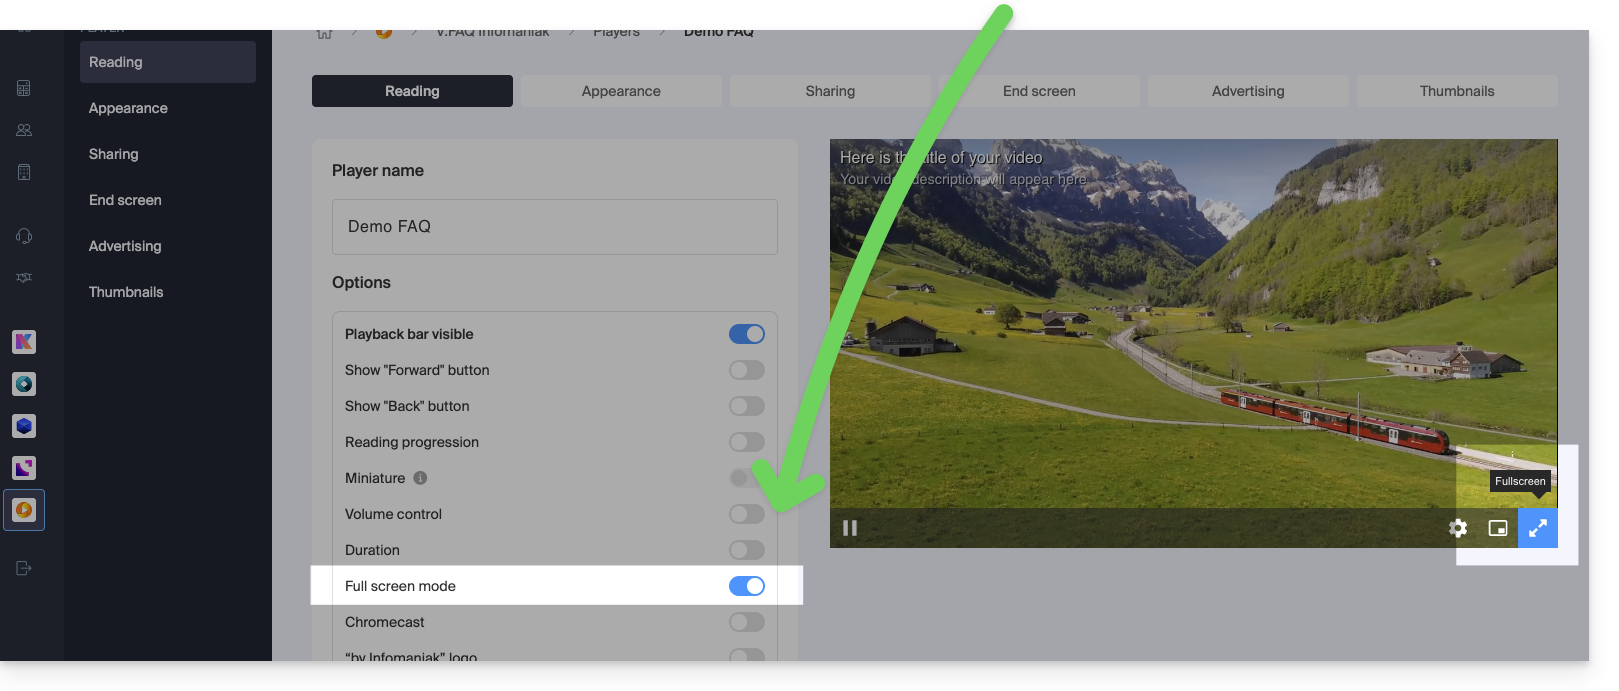
Link to this FAQ:
Has this FAQ been helpful?
This guide presents the operation and configuration of the transcoding rules for the Infomaniak VOD/AOD service. This service allows you to store, manage, and stream your multimedia files online, while automating their encoding through a hierarchical folder system.
Preamble
- The presets are optimized to generate 4 qualities ranging from 360p to 1080p (HD):
- to go beyond, 2k, 4K it is necessary to manually create these encoding rules.
- Each folder (root or subfolder) can be configured with specific transcoding rules that define how imported media will be encoded (video and audio).
- There is no re-encoding of already imported media if:
- you modify a rule after the fact
- you move a file to another folder
- To apply a new rule, you need to replace or re-upload the file.
Configure encoding rules
To access the configuration of the encodings to be used for any media sent to the folder root:
- Click here to access the management of your product on the Infomaniak Manager (need help?).
- Click directly on the name assigned to the product concerned.
- Click on Media in the left sidebar.
- Click on Media Management in the left sidebar.
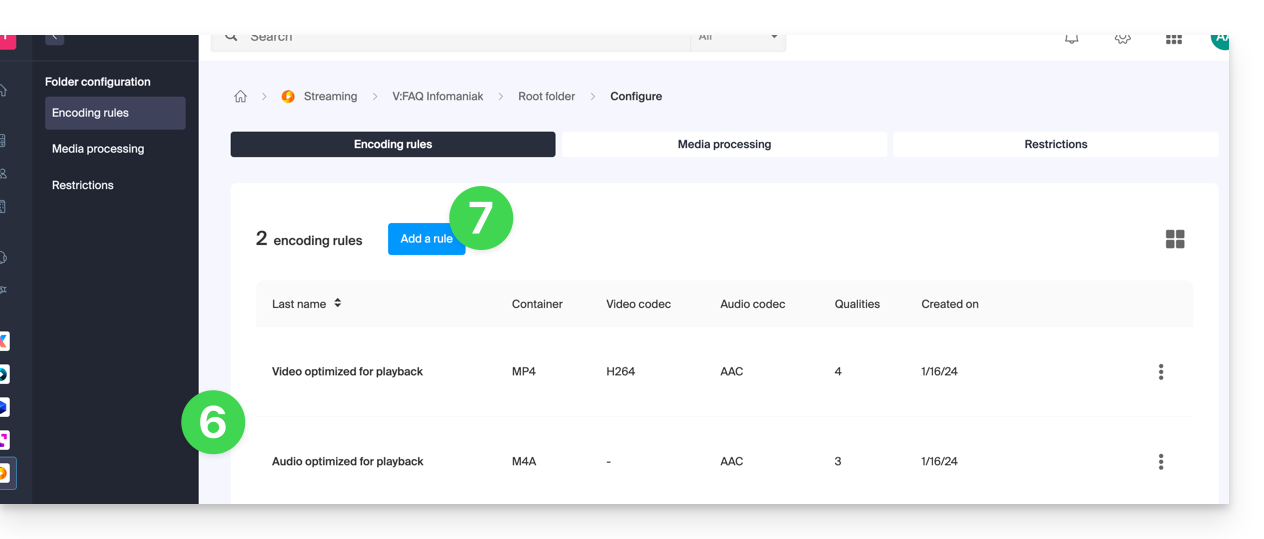
- You arrive at the root folder; click on Configure:

- Default encoding rules are usually always presented.
- Click on the button to add new ones:
- Choose presets optimized for your uses — or select the advanced mode to precisely define your parameters:
- Video: codec (H.264, H.265, VP9…), resolution, framerate, bitrate, ratio.
- Audio: codec (AAC, MP3…), bitrate, sampling frequency.
- Click on the field to select an encoding.
- Click on Create a custom encoding:

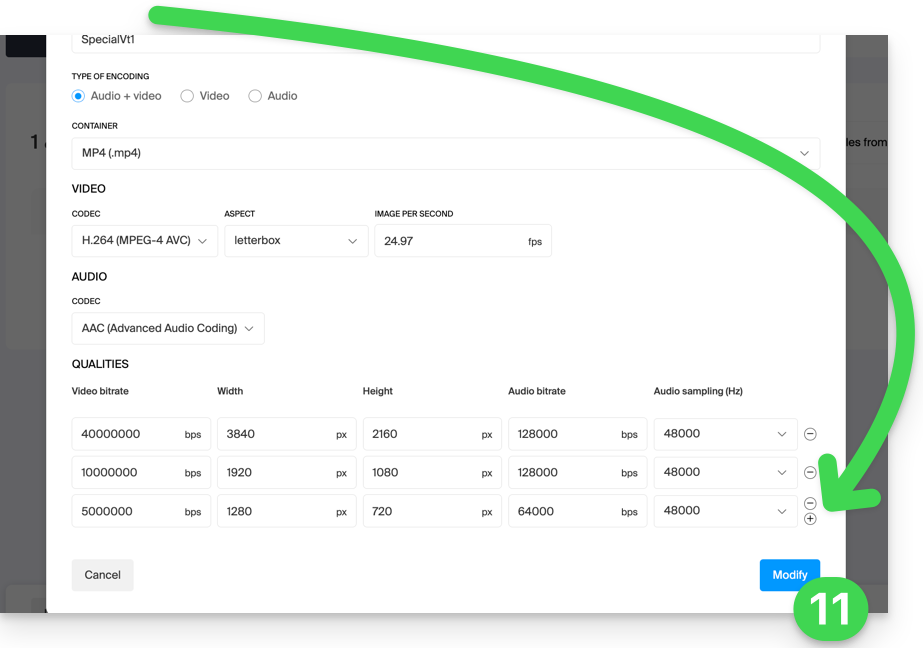
Name the rule, enter the audio/video settings according to your needs, you can control the behavior of the ratio (width/height ratio):
keep_ratio: keeps the original ratio; if the requested dimensions do not match, black bars are added.copy: keeps the original aspect ratio without adaptation; if the resolution differs, the image may be distorted.fill: the video is resized to fill the entire resolution while maintaining the ratio; part of the image may be cropped (crop).stretch: the video is resized to the requested resolution without respecting the ratio, which causes distortion.
Multiple qualities can be managed within a single rule; do not forget to validate to add the rule:
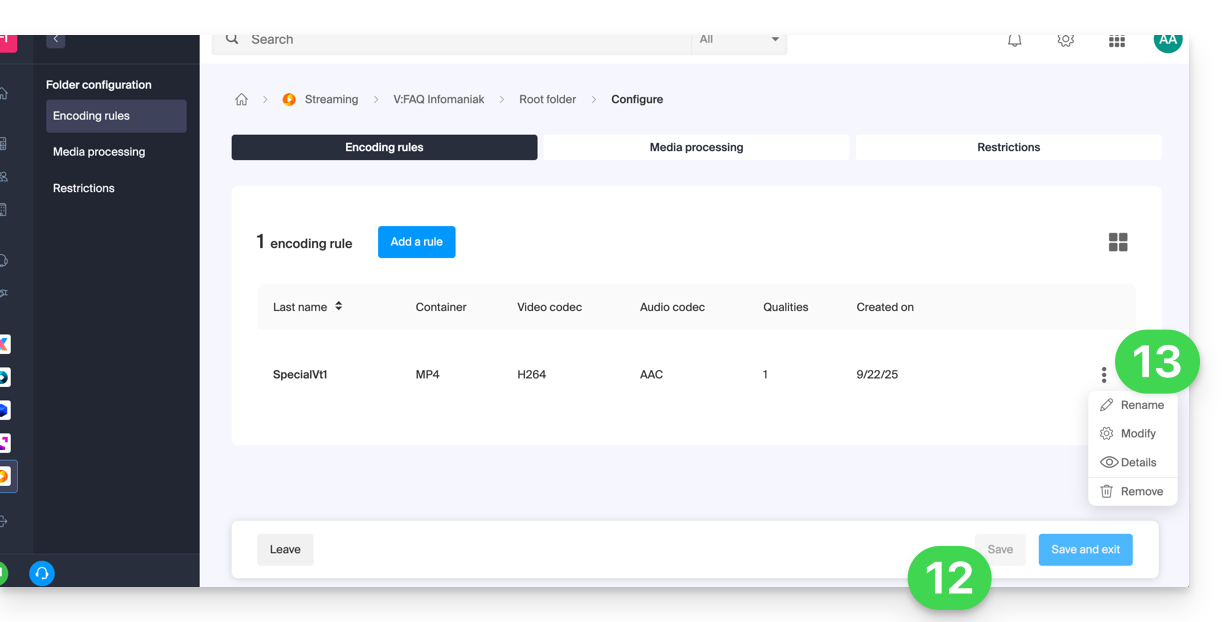
- The new rule is added, click on the Save button to save the addition.
- If necessary, you can keep only this new rule and remove the previous rules by clicking on the action menu ⋮ to the right of the concerned rules in the displayed table and then deleting them; the menu also allows you to review the details of your custom encoding, modify or rename them:
Inheritance of settings
If you define a configuration on the folder root, it will be automatically applied to all subfolders created inside, each folder inheriting by default the parameters of the parent folder. This or these encoding rules will therefore apply to the media you import into your VOD/AOD space, including if they are in a subfolder.
However, be careful, rules can be defined per folder so a subfolder you create may apply specific encoding rules: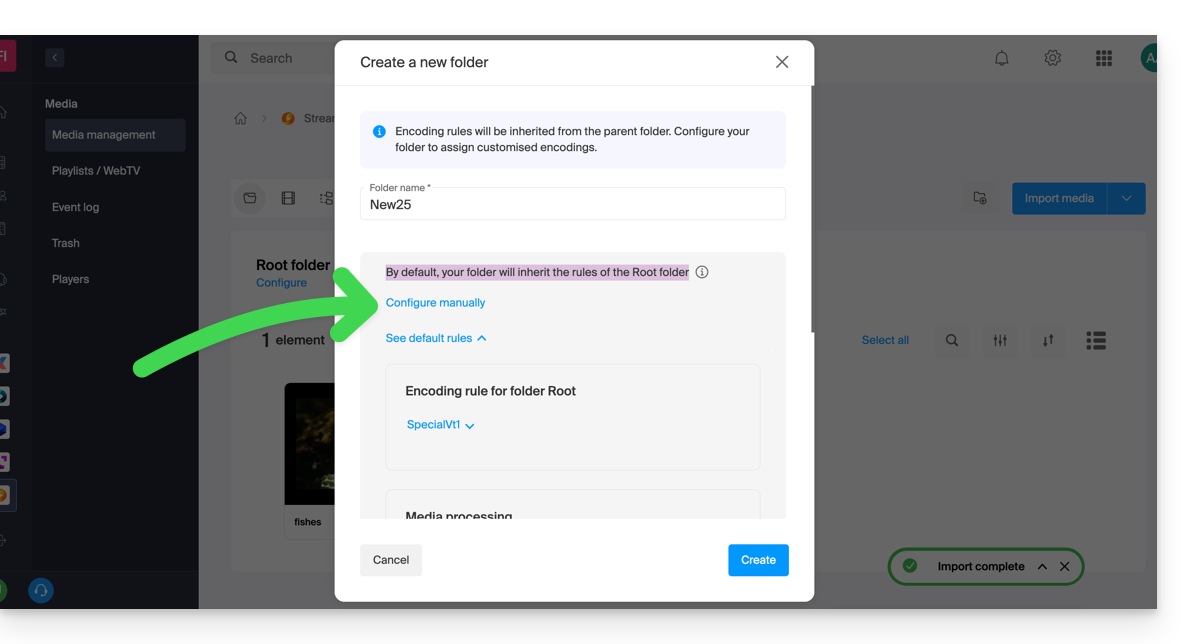
Disable inheritance at any time from the configuration page of the existing folder to define specific settings:
Link to this FAQ:
Has this FAQ been helpful?
This guide explains how to create and manage your authentication tokens to interact with the Infomaniak API securely.
Preamble
- Token features:
- Number: no limit on creation
- Validity: unlimited by default (customizable upon creation)
- Inactivity: a token is automatically deactivated if it is not used for a year
- Usage example:
Manage API tokens
When creating, you must define the application and the access scope:
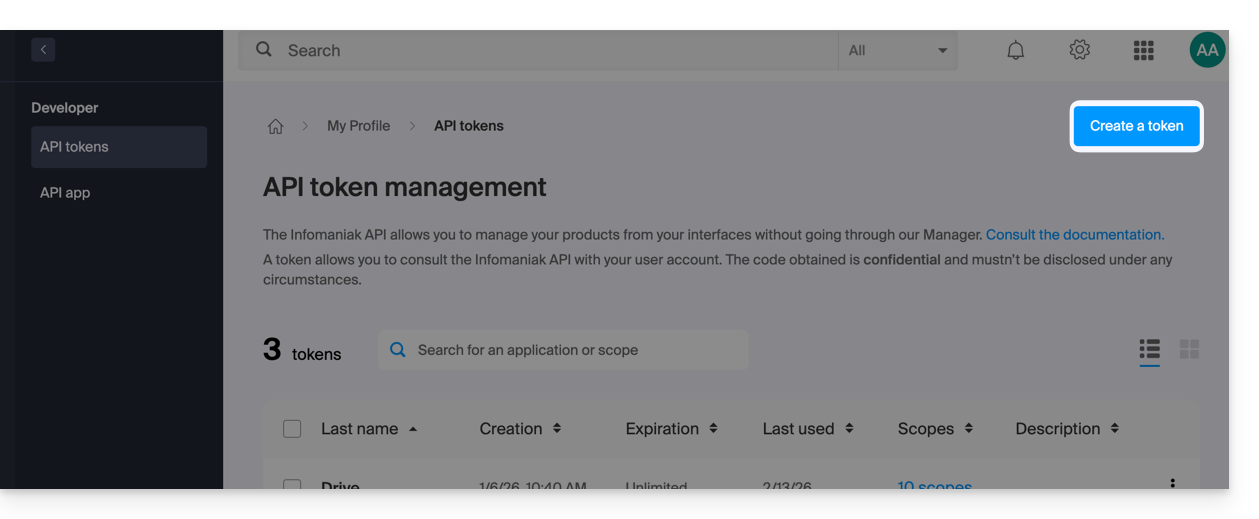
- Access token management on the Manager (need help?).
- Click on Create a token:
- Select the product/application and the validity period:
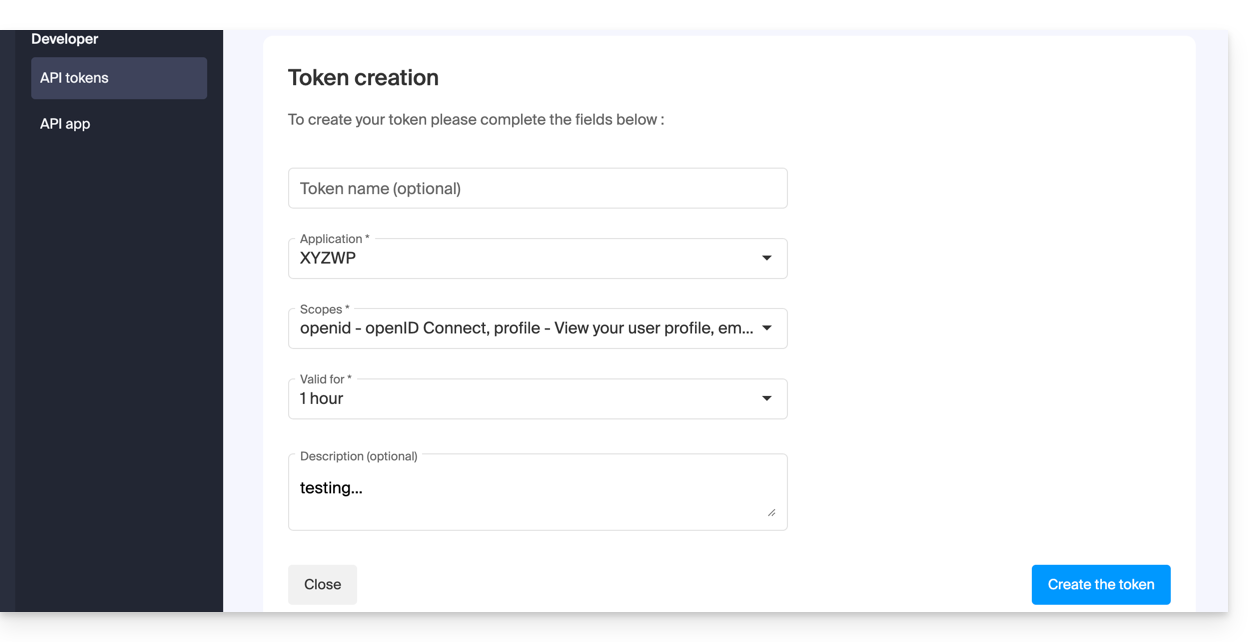
- Confirm the operation with your account password.
- Important: copy the token and keep it in a safe place; it will no longer be displayed afterwards.
To delete, select them and click on the revocation button that appears: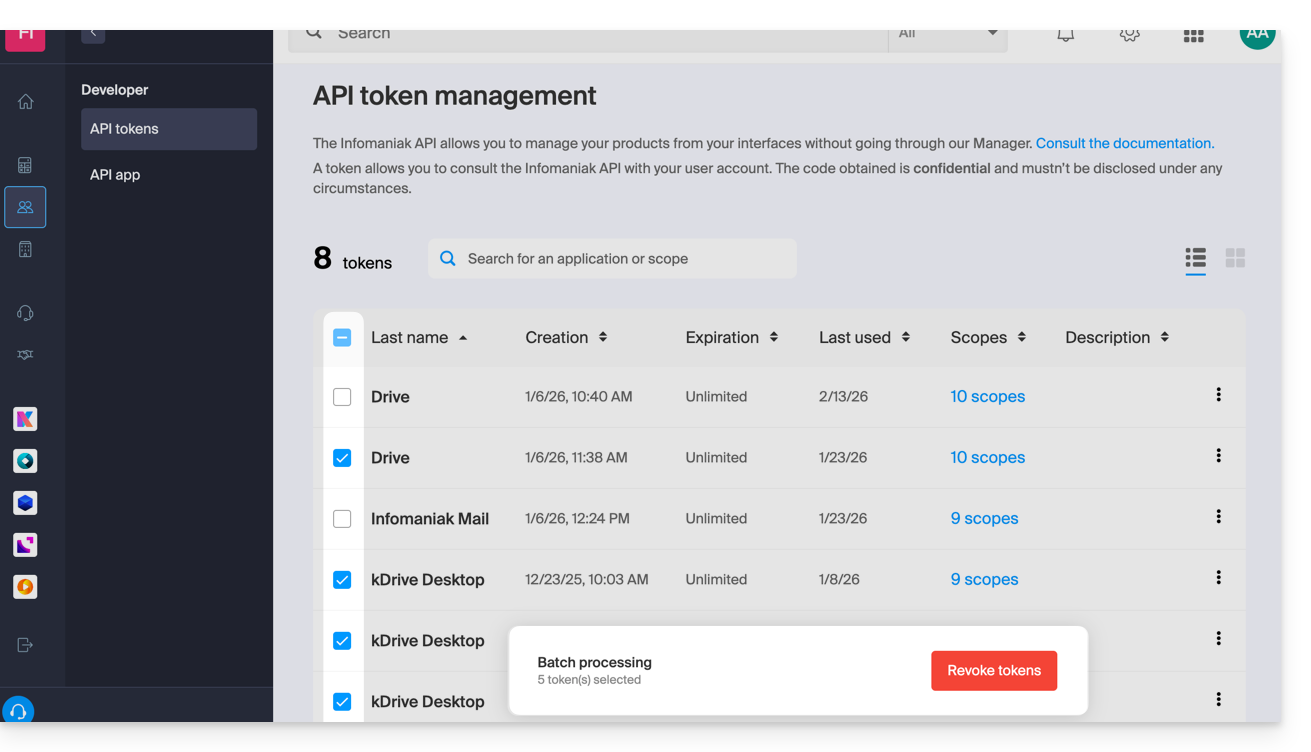
Link to this FAQ:
Has this FAQ been helpful?
This guide details how Infomaniak's VOD/AOD consumption is calculated.
Calculate consumption
The calculation of your monthly consumption is based on the aggregation of two essential criteria. At the end of each billing period, two elements are automatically taken into account:
- disk space : this includes the amount of data stored in your space, including that in the trash
- bandwidth : this represents the bandwidth consumption over your monthly period (renewed on your due date)
The sum of these two values constitutes the total amount of your consumption for the specified period.
In addition, a remaining time indicator is available to inform you of the number of days remaining until the next due date.
If the allowed quota is exceeded
Several options are available to you:
- Empty the trash : first, it is recommended to check if your trash is full; if you are sure that these files are no longer used, by emptying it, you can free up valuable space.
- Pay the overage fee : if you consider the overage to be temporary, you will need to pay the additional fees per gigabyte consumed; for more information on this, refer to the pricing page indicating the different overage costs according to the pack.
- Upgrade your offer : if you have more and more media or if they are heavily consulted, you have the option to upgrade to a higher pack.
Link to this FAQ:
Has this FAQ been helpful?